Best Herbs to Grow Indoors Top 5 Choices
Cultivate fresh herbs indoors with these top 5 easy-to-grow varieties. Enhance your cooking with homegrown flavors.

Cultivate fresh herbs indoors with these top 5 easy-to-grow varieties. Enhance your cooking with homegrown flavors.
Best Herbs to Grow Indoors Top 5 Choices
Hey there, aspiring indoor gardener! Ever dreamed of having fresh herbs at your fingertips, ready to snip and add to your culinary creations? Well, you're in luck! Growing herbs indoors is not only incredibly rewarding but also surprisingly easy, even if you're a complete beginner. Imagine the convenience of grabbing a sprig of basil for your pasta or a handful of mint for your tea, all without stepping outside. It's a game-changer for any home cook or anyone who simply loves the aroma of fresh greenery.
This comprehensive guide will walk you through everything you need to know to successfully grow the top 5 easiest herbs indoors. We'll cover the basics of light, water, soil, and even delve into specific product recommendations to get you started. So, let's dig in and transform your kitchen into a vibrant, aromatic herb haven!
Why Grow Herbs Indoors Benefits and Advantages
Beyond the sheer convenience, there are tons of fantastic reasons to cultivate an indoor herb garden. First off, it's incredibly cost-effective. Think about how much you spend on those small, often wilted, packets of fresh herbs at the grocery store. Growing your own means a continuous supply, saving you money in the long run. Plus, you control what goes into your herbs – no pesticides or unknown chemicals, just pure, fresh goodness. It's also a fantastic way to add a touch of nature and greenery to your living space, improving air quality and boosting your mood. And let's not forget the sheer joy of nurturing something from seed to harvest. It's a truly satisfying experience!
Essential Requirements for Indoor Herb Success Light Water Soil
Before we dive into specific herbs, let's talk about the foundational elements for any successful indoor plant: light, water, and soil. Getting these right is crucial for happy, thriving herbs.
Light Requirements for Indoor Herbs Understanding Sunlight and Grow Lights
Light is arguably the most critical factor for indoor herbs. Most herbs are sun-lovers and need at least 4-6 hours of direct sunlight per day. A south-facing window is usually ideal, providing the most intense light. East or west-facing windows can also work, but north-facing windows typically don't offer enough light for most herbs to flourish.
If you don't have adequate natural light, don't despair! Grow lights are your best friend. They provide the full spectrum of light that plants need for photosynthesis. There are several types of grow lights, each with its pros and cons:
- Fluorescent Lights (T5 or T8): These are a great budget-friendly option for beginners. They're energy-efficient and don't produce much heat. Look for 'full spectrum' or 'daylight' bulbs.
- LED Grow Lights: While often a higher upfront cost, LEDs are incredibly energy-efficient, have a long lifespan, and produce very little heat. They come in various spectrums, with 'full spectrum' being ideal for herbs.
- Incandescent Lights: Avoid these for growing plants. They produce too much heat and not enough of the right kind of light.
Product Recommendation: Barrina T5 Grow Lights (2ft, 80W, 8-Pack)
These are fantastic for beginners. They're affordable, easy to install, and provide excellent full-spectrum light. You can daisy-chain them together, making them versatile for different setups. They typically retail for around $60-$80 for an 8-pack, offering great value. Ideal for shelving units or hanging above a small herb garden.
Product Recommendation: MARS HYDRO TS 600W LED Grow Light
If you're looking for a more powerful and energy-efficient option, especially if you plan to expand your indoor garden, the MARS HYDRO TS 600W is a popular choice. It's a full-spectrum LED light that's great for all stages of plant growth. Expect to pay around $70-$100 for this unit. It's perfect for a dedicated grow tent or a larger indoor setup.
Watering Your Indoor Herbs The Right Way to Hydrate
Overwatering is a common killer of indoor plants, including herbs. It's crucial to let the top inch or two of soil dry out before watering again. Stick your finger into the soil to check – if it feels dry, it's time to water. When you do water, do so thoroughly until water drains from the bottom of the pot. This ensures the entire root ball gets hydrated. Always use pots with drainage holes!
Tip: Consider using a moisture meter if you're unsure. They're inexpensive and can take the guesswork out of watering.
Product Recommendation: XLUX T10 Soil Moisture Meter
This simple, battery-free moisture meter is a lifesaver for beginners. Just stick it in the soil, and it tells you if your plant needs water. It's usually available for $10-$15. A must-have for preventing over or under-watering.
Soil and Potting Mix Choosing the Best Medium
Good drainage is key for herbs. A high-quality potting mix designed for containers is your best bet. Avoid using garden soil, as it can compact in pots and lead to poor drainage and root rot. Look for potting mixes that contain perlite or vermiculite, which help with aeration and drainage.
Product Recommendation: FoxFarm Ocean Forest Potting Soil
This is a premium potting mix that's well-regarded by many gardeners. It's rich in organic matter and provides excellent drainage. A 1.5 cubic foot bag typically costs around $20-$30. While a bit pricier, it sets your herbs up for success from the start.
Product Recommendation: Miracle-Gro Potting Mix
A more widely available and affordable option, Miracle-Gro Potting Mix is a decent choice for beginners. It's readily available at most garden centers and supermarkets, usually costing around $10-$15 for a large bag. Just ensure it has good drainage.
Top 5 Easiest Herbs to Grow Indoors A Detailed Look
Now for the stars of the show! These five herbs are known for their resilience and relatively low maintenance, making them perfect for indoor growing.
1. Basil The Aromatic Culinary Staple
Basil is a beloved herb, famous for its sweet, peppery flavor that's essential in Italian and many Asian cuisines. It's a fast grower and incredibly rewarding to cultivate indoors.
Basil Varieties and Growth Habits Choosing the Right Type
While there are many basil varieties, 'Genovese' is the most common and a great choice for beginners. 'Sweet Basil' is also popular. For smaller spaces, 'Dwarf Basil' or 'Bush Basil' are excellent compact options. Basil typically grows upright, reaching 12-24 inches tall, but regular harvesting keeps it bushy.
Optimal Conditions for Indoor Basil Light Water and Temperature
Basil absolutely loves light. Aim for 6-8 hours of direct sunlight daily. If natural light is insufficient, a grow light is a must. Keep the soil consistently moist but not waterlogged. Basil is sensitive to cold, so maintain a room temperature between 65-75°F (18-24°C). Avoid placing it near drafty windows or air conditioning vents.
Harvesting and Pruning Basil Maximizing Yield and Flavor
Regular harvesting is key to keeping your basil plant productive and bushy. Once the plant has at least two sets of true leaves, you can start pinching off the top sets of leaves. Always pinch just above a leaf node (where two leaves emerge from the stem). This encourages the plant to branch out, leading to more leaves. Avoid taking more than one-third of the plant at a time. If you see flower buds forming, pinch them off immediately, as flowering can make the leaves bitter.
Common Basil Problems and Solutions Pests and Diseases
Basil can sometimes attract aphids or spider mites. A strong spray of water can dislodge them, or you can use insecticidal soap. Yellowing leaves often indicate overwatering or a nutrient deficiency. Ensure good drainage and consider a balanced liquid fertilizer if needed.
2. Mint The Refreshing and Vigorous Grower
Mint is incredibly versatile, perfect for teas, cocktails, desserts, and savory dishes. It's also notoriously easy to grow, sometimes almost too easy!
Mint Varieties and Growth Habits Containing Its Spread
Popular indoor mint varieties include 'Spearmint' and 'Peppermint'. 'Chocolate Mint' and 'Mojito Mint' are also fun choices. Mint is a vigorous spreader, sending out runners, so it's best grown in its own pot to prevent it from taking over other plants. It tends to grow bushy and can trail if given the space.
Optimal Conditions for Indoor Mint Light Water and Temperature
Mint prefers bright, indirect light but can tolerate some direct sun. 4-6 hours of light is usually sufficient. Keep the soil consistently moist; mint doesn't like to dry out completely. Room temperature (60-70°F / 15-21°C) is ideal. It's quite forgiving.
Harvesting and Pruning Mint Encouraging Bushy Growth
Harvest mint by pinching off stems just above a leaf node. Regular harvesting encourages bushier growth and prevents the plant from becoming leggy. You can harvest quite a bit from a healthy mint plant. If it starts to look leggy, don't be afraid to give it a good trim.
Common Mint Problems and Solutions Pests and Diseases
Mint is generally pest-resistant, but spider mites can occasionally be an issue, especially in dry conditions. Increase humidity around the plant or use insecticidal soap. Yellowing leaves can indicate too much water or not enough nutrients.
3. Chives The Mild Oniony Delight
Chives offer a delicate oniony flavor without the pungency, making them perfect for garnishes, eggs, and salads. They're also very low-maintenance indoors.
Chives Varieties and Growth Habits Clumping and Upright
Common chives are the most popular for indoor growing. Garlic chives, with their flatter leaves and garlicky flavor, are another option. Chives grow in clumps of slender, hollow, grass-like leaves, typically reaching 8-12 inches tall.
Optimal Conditions for Indoor Chives Light Water and Temperature
Chives prefer bright light, ideally 4-6 hours of direct sun. They can tolerate slightly less light than basil but will be less productive. Keep the soil consistently moist but not soggy. They thrive in average room temperatures (60-70°F / 15-21°C).
Harvesting and Pruning Chives Continuous Supply
Harvest chives by snipping the outer leaves about an inch above the soil line. This encourages new growth from the center of the clump. Harvest regularly to keep the plant producing fresh leaves. You can harvest about one-third of the plant at a time.
Common Chives Problems and Solutions Pests and Diseases
Chives are generally pest-free. Overwatering can lead to root rot, so ensure good drainage. If the tips of the leaves turn brown, it might be due to dry air; misting can help.
4. Rosemary The Woody and Fragrant Herb
Rosemary, with its pine-like aroma and flavor, is a staple in Mediterranean cooking. While it can be a bit pickier than the others, it's still very doable indoors with the right care.
Rosemary Varieties and Growth Habits Upright and Trailing Forms
For indoor growing, 'Arp' and 'Tuscan Blue' are good upright varieties. 'Prostratus' is a trailing variety that looks lovely in hanging baskets. Rosemary can grow into a small shrub if given enough space, but indoors, it will remain more compact.
Optimal Conditions for Indoor Rosemary Light Water and Temperature
Rosemary demands a lot of light – 6-8 hours of direct sunlight is essential. If you don't have a very sunny window, a strong grow light is highly recommended. Unlike many herbs, rosemary prefers its soil to dry out slightly between waterings. It's very susceptible to root rot if overwatered. It prefers cooler temperatures, ideally between 60-70°F (15-21°C), and good air circulation.
Harvesting and Pruning Rosemary Maintaining Shape and Health
Harvest rosemary by snipping off sprigs as needed. Always cut just above a leaf node to encourage new growth. Regular pruning helps maintain its shape and prevents it from becoming leggy. You can also prune it into a small topiary if you're feeling fancy!
Common Rosemary Problems and Solutions Pests and Diseases
Rosemary is prone to powdery mildew if air circulation is poor or humidity is too high. Ensure good airflow and avoid overwatering. Spider mites can also be an issue in dry conditions. Yellowing needles often indicate overwatering, while browning needles can mean underwatering or too little light.
5. Thyme The Hardy and Versatile Herb
Thyme is a small but mighty herb, offering an earthy, savory flavor that's perfect for roasted meats, vegetables, and soups. It's incredibly hardy and forgiving, making it an excellent choice for beginners.
Thyme Varieties and Growth Habits Low Growing and Spreading
Common thyme is the most popular for culinary use. Lemon thyme offers a citrusy note, while creeping thyme is more ornamental. Thyme typically grows low and bushy, often spreading outwards, making it suitable for wider pots.
Optimal Conditions for Indoor Thyme Light Water and Temperature
Thyme needs plenty of light, at least 6 hours of direct sunlight daily. It can tolerate slightly less than rosemary but will be less vigorous. Like rosemary, thyme prefers its soil to dry out between waterings. It's quite drought-tolerant once established. It thrives in average room temperatures (60-70°F / 15-21°C) and appreciates good air circulation.
Harvesting and Pruning Thyme Encouraging New Growth
Harvest thyme by snipping off sprigs as needed, just above a leaf node. Regular harvesting encourages new growth and keeps the plant compact. You can harvest about one-third of the plant at a time. If it starts to get woody, a good prune can rejuvenate it.
Common Thyme Problems and Solutions Pests and Diseases
Thyme is generally pest and disease resistant. Overwatering is the most common issue, leading to root rot. Ensure excellent drainage. If the plant looks leggy, it's likely not getting enough light.
Choosing the Right Containers and Potting Techniques
The right pot makes a big difference! For herbs, drainage is paramount. Terracotta pots are excellent because they're porous and allow the soil to breathe, helping to prevent overwatering. Plastic pots are also fine, but you'll need to be more careful with watering. Ensure any pot you choose has drainage holes at the bottom.
Pot Size and Material Considerations for Herb Growth
Start with a pot that's at least 6 inches in diameter for individual herb plants. As your herbs grow, you might need to repot them into larger containers. For mint, as mentioned, a dedicated pot is best due to its spreading nature. For other herbs, you can plant multiple herbs in a larger container, just ensure they have similar light and water needs.
Potting Mix and Drainage Layer Best Practices
Always use a high-quality potting mix. Avoid adding a layer of gravel or broken pot pieces at the bottom of your pot. Contrary to popular belief, this actually hinders drainage by creating a perched water table, which can lead to root rot. Just use potting mix all the way down to the drainage holes.
Fertilizing Your Indoor Herbs When and What to Feed
Indoor herbs generally don't need a lot of fertilizer, especially if you're using a good quality potting mix that already contains some nutrients. However, after a few months, or if your plants look a bit pale, a light feeding can be beneficial. Use a balanced liquid fertilizer at half strength every 2-4 weeks during the growing season (spring and summer). Reduce or stop fertilizing in fall and winter when growth slows down.
Product Recommendation: Espoma Organic Indoor Plant Food
This is a great organic option that's gentle on plants and easy to use. It's specifically formulated for indoor plants and provides a balanced nutrient profile. A bottle typically costs around $10-$15 and will last a long time for a small herb garden.
Pest and Disease Management for Indoor Herbs Natural Solutions
Even indoors, pests can sometimes find their way to your herbs. Common culprits include aphids, spider mites, and fungus gnats. The good news is, you can usually deal with them naturally.
Identifying Common Indoor Herb Pests and Their Signs
- Aphids: Small, pear-shaped insects, often green, black, or brown, found on new growth. They leave behind sticky residue (honeydew).
- Spider Mites: Tiny, almost invisible mites that create fine webbing on leaves. Leaves may appear stippled or discolored.
- Fungus Gnats: Small, dark flies that hover around the soil surface. Their larvae feed on roots, especially in overly wet soil.
Natural Pest Control Methods for a Healthy Herb Garden
- Manual Removal: For aphids, a strong spray of water can dislodge them. For larger pests, pick them off by hand.
- Insecticidal Soap: A safe and effective way to control many soft-bodied pests. Make sure to coat all surfaces of the plant.
- Neem Oil: A natural pesticide that disrupts insect feeding and reproduction. Mix with water and spray on plants.
- Sticky Traps: Yellow sticky traps are great for catching adult fungus gnats and other flying insects.
- Good Air Circulation: Helps prevent fungal diseases and deters some pests.
- Proper Watering: Avoid overwatering to prevent fungus gnats and root rot.
Product Recommendation: Safer Brand Insect Killing Soap
This ready-to-use insecticidal soap is a go-to for many indoor gardeners. It's effective against aphids, spider mites, and other common pests, and it's safe to use on edible plants. A 32oz spray bottle costs around $10-$15.
Product Recommendation: Dyna-Gro Pure Neem Oil
Neem oil is a powerful organic solution for pest control and even some fungal issues. You'll need to dilute it with water and a little bit of dish soap (as an emulsifier) before spraying. A small bottle (8oz) can cost around $15-$20 but will last a very long time.
Troubleshooting Common Indoor Herb Problems Yellowing Leaves Wilting and Legginess
Even with the best care, your herbs might occasionally show signs of distress. Here's how to diagnose and fix common issues:
Yellowing Leaves Diagnosing Nutrient Deficiencies or Overwatering
Yellow leaves are often a sign of overwatering. Check the soil moisture. If it's consistently wet, reduce watering frequency and ensure good drainage. It can also indicate a nutrient deficiency, especially if the plant has been in the same pot for a long time without fresh soil or fertilizer. Consider a light feeding.
Wilting Herbs Understanding Underwatering and Root Rot
Wilting can be tricky because it can mean both underwatering and overwatering (due to root rot). Check the soil. If it's bone dry, your plant is thirsty. If it's soggy and smells foul, you might have root rot. For root rot, you may need to repot into fresh, well-draining soil after trimming away any mushy roots.
Leggy Growth Addressing Insufficient Light
If your herbs are stretching towards the light, with long stems and sparse leaves, they're becoming 'leggy.' This is a clear sign they're not getting enough light. Move them to a brighter spot or supplement with a grow light. Regular pruning can also help encourage bushier growth.
Harvesting and Storing Your Indoor Herbs Maximizing Freshness
The best part about growing your own herbs is harvesting them! Regular harvesting actually encourages your plants to produce more. For most herbs, it's best to harvest in the morning after the dew has dried but before the sun gets too hot.
Best Practices for Harvesting Different Herb Types
As mentioned for each herb, generally snip off stems or leaves just above a leaf node. Avoid taking more than one-third of the plant at a time to allow it to recover and continue growing.
Storing Fresh Herbs Extending Shelf Life
- Refrigeration: For most herbs (except basil), you can store them like a bouquet of flowers. Place the stems in a glass of water, cover loosely with a plastic bag, and refrigerate. They can last for a week or two.
- Freezing: Chop herbs finely, place them in ice cube trays, cover with water or olive oil, and freeze. Once frozen, transfer the cubes to a freezer bag. This is great for cooking.
- Drying: Tie small bundles of herbs and hang them upside down in a cool, dark, well-ventilated area. Once brittle, crumble and store in airtight containers.
Beyond the Basics Advanced Tips for Thriving Indoor Herbs
Once you've mastered the basics, you might want to explore some advanced techniques to take your indoor herb garden to the next level.
Humidity and Air Circulation Creating the Ideal Environment
Most herbs appreciate moderate humidity. If your home is very dry, especially in winter, consider placing your pots on a pebble tray filled with water (ensure the pot isn't sitting directly in the water). Good air circulation is also important to prevent fungal diseases. A small oscillating fan can help, especially if you're using grow lights in an enclosed space.
Repotting and Root Pruning When and How to Refresh
As your herbs grow, they might become root-bound, meaning their roots have filled the pot. Signs include water running straight through the pot, stunted growth, or roots growing out of the drainage holes. When this happens, it's time to repot into a slightly larger container with fresh potting mix. You can also gently prune some of the outer roots to encourage new growth before repotting into the same size pot.
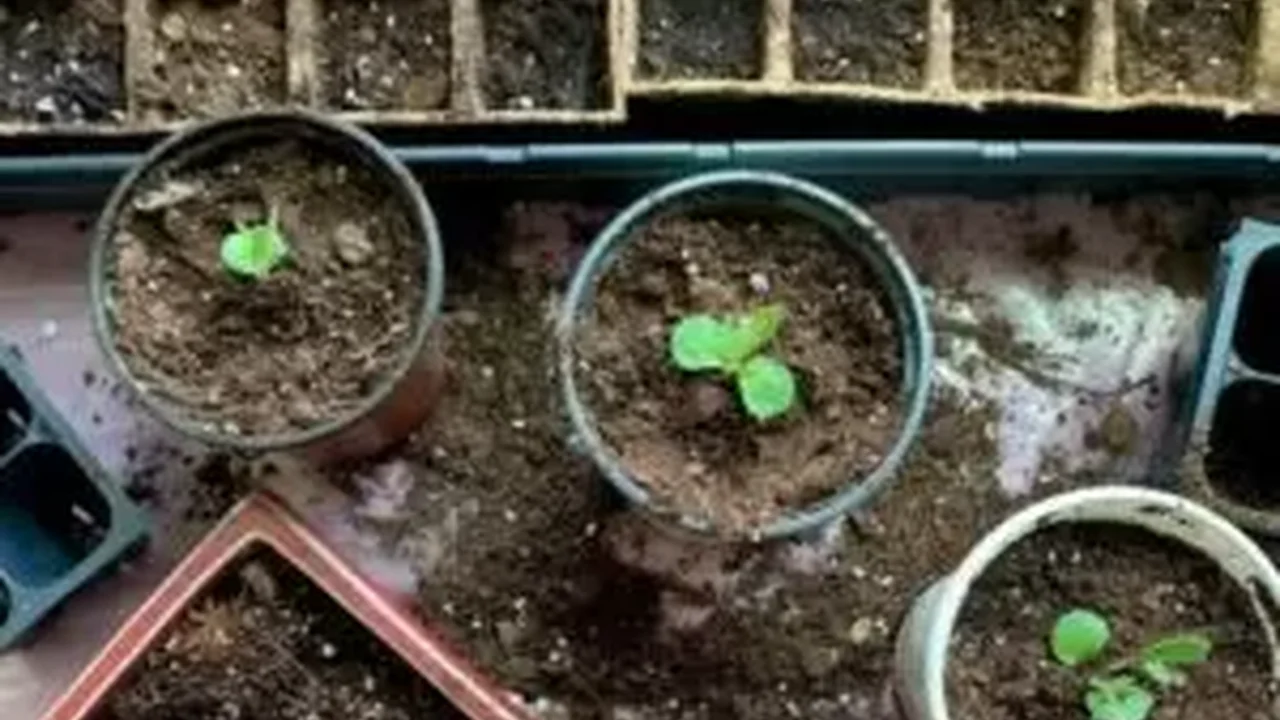
Propagating Herbs from Cuttings Expanding Your Collection
Many herbs, especially mint, basil, and rosemary, can be easily propagated from cuttings. Simply snip a 4-6 inch stem, remove the lower leaves, and place the cutting in a glass of water or directly into moist potting mix. Keep it in a warm, bright spot, and roots should form within a few weeks. This is a fantastic way to get free plants and share with friends!
Setting Up Your Indoor Herb Garden Different Scenarios and Product Comparisons
How you set up your indoor herb garden depends on your space, budget, and how serious you are about growing. Here are a few common scenarios and product comparisons.
Scenario 1 Sunny Windowsill Setup
This is the simplest and most budget-friendly option. If you have a south-facing window that gets at least 6 hours of direct sun, you're good to go. You'll primarily need pots, good potting mix, and your chosen herb plants or seeds.
Product Comparison: Terracotta Pots vs. Plastic Pots
- Terracotta Pots: Pros: Excellent drainage, breathable, classic look. Cons: Heavier, can dry out faster, more fragile. Price: $5-$15 per pot depending on size.
- Plastic Pots: Pros: Lightweight, retain moisture longer, durable, affordable. Cons: Less breathable, can lead to overwatering if not careful. Price: $2-$10 per pot depending on size.
Recommendation: For beginners, a mix of both can be good. Terracotta for herbs that prefer drier conditions (rosemary, thyme) and plastic for those that like more consistent moisture (mint, basil).
Scenario 2 Grow Light Shelf Setup
If you lack sufficient natural light or want to grow more herbs, a shelving unit with grow lights is an excellent investment. This allows you to create a dedicated growing space.
Product Comparison: Barrina T5 Grow Lights vs. MARS HYDRO TS 600W LED Grow Light
- Barrina T5 Grow Lights: Pros: Very affordable, easy to daisy-chain, low heat, good for starting seeds and leafy greens. Cons: Less intense light than LEDs, may not be enough for very demanding plants. Price: ~$60-$80 for an 8-pack. Use Case: Small to medium-sized setups, shelving units, budget-conscious growers.
- MARS HYDRO TS 600W LED Grow Light: Pros: Highly energy-efficient, powerful full-spectrum light, long lifespan, good for all growth stages. Cons: Higher upfront cost, can be overkill for just a few herbs. Price: ~$70-$100. Use Case: Larger indoor gardens, grow tents, serious growers looking for efficiency and power.
Recommendation: For a dedicated herb shelf, the Barrina T5s are usually more than sufficient and very cost-effective. If you plan to grow other, more light-hungry plants or expand significantly, the MARS HYDRO is a better long-term investment.
Scenario 3 Hydroponic Herb Garden Setup
For the tech-savvy or those looking for faster growth and less mess, a small hydroponic system can be a fantastic way to grow herbs. These systems grow plants in water with nutrient solutions, without soil.
Product Comparison: AeroGarden Harvest vs. iDoo Hydroponics Growing System
- AeroGarden Harvest: Pros: Extremely user-friendly, compact, automated lighting and watering, comes with seed pods. Cons: Higher upfront cost, proprietary seed pods can be expensive, limited plant capacity. Price: ~$100-$150. Use Case: Absolute beginners who want a plug-and-play solution, small kitchens, growing 3-6 herbs at a time.
- iDoo Hydroponics Growing System: Pros: More affordable than AeroGarden, often larger capacity, still relatively easy to use, can use your own seeds. Cons: May require a bit more manual setup than AeroGarden, less brand recognition. Price: ~$60-$100. Use Case: Beginners who want a slightly larger capacity than AeroGarden, more budget-conscious, willing to experiment with their own seeds.
Recommendation: If convenience is your top priority and budget isn't a major concern, AeroGarden is a fantastic choice. If you want a similar experience at a lower price point and don't mind a little more DIY, the iDoo system is a great alternative.
Final Thoughts on Your Indoor Herb Journey
Growing herbs indoors is a journey of learning and discovery. Don't be discouraged if you face a few challenges along the way. Every yellow leaf or wilting stem is an opportunity to learn more about your plants and their needs. With the right light, water, soil, and a little bit of love, you'll soon be enjoying a continuous supply of fresh, fragrant herbs right from your kitchen. Happy growing!
:max_bytes(150000):strip_icc()/277019-baked-pork-chops-with-cream-of-mushroom-soup-DDMFS-beauty-4x3-BG-7505-5762b731cf30447d9cbbbbbf387beafa.jpg)