DIY Garden Projects 3 Easy Ideas for Beginners
{ "article": [ { "title": "DIY Garden Projects 3 Easy Ideas for Beginners", "meta_description": "Embark on 3 simple DIY garden projects perfect for beginners. Enhance your garden with creative and functional additions.", "content": "Embark on 3 simple DIY garden projects perfect for beginners. Enhance your garden with creative and functional additions.\n\n
\n\n
Hey there, fellow green thumbs! Are you ready to roll up your sleeves and add some personal flair to your garden without breaking the bank or needing a construction degree? Great! DIY garden projects are not just about saving money; they're about infusing your outdoor space with personality, functionality, and a whole lot of love. For beginners, the idea of 'DIY' might sound intimidating, but trust me, these three projects are super approachable, require minimal tools, and will give you a huge sense of accomplishment. Let's dive in and make your garden truly yours!
\n\n1. DIY Raised Garden Bed Building Your First Elevated Oasis
\n\nRaised garden beds are a game-changer for beginners. They offer better drainage, warmer soil earlier in the season, fewer weeds, and easier access for planting and harvesting. Plus, they look incredibly neat and tidy. Forget complex designs; we're going for simple and effective.
\n\nWhy a Raised Garden Bed is Perfect for Beginners
\n\n- \n
- Soil Control: You get to choose your soil mix, ensuring it's nutrient-rich and well-draining from day one. No more battling compacted, poor native soil! \n
- Weed Reduction: Because you're bringing in new soil, you'll have significantly fewer weed seeds to contend with initially. \n
- Improved Drainage: Raised beds naturally drain better, preventing waterlogging which can be detrimental to plant roots. \n
- Easier on Your Back: No more excessive bending or kneeling! This is a huge plus for anyone with mobility issues or just looking for a more comfortable gardening experience. \n
- Extended Growing Season: The soil in raised beds warms up faster in spring, allowing you to plant earlier. \n
Materials You'll Need for Your DIY Raised Garden Bed
\n\n- \n
- Lumber: The most common and easiest material for beginners. Opt for untreated wood like cedar, redwood, or cypress for longevity and safety, especially if you're growing edibles. Pine is cheaper but won't last as long. For a 4x8 foot bed, you'll need two 8-foot long 2x6s and two 4-foot long 2x6s. If you want a taller bed, double or triple the layers. \n
- Corner Brackets or Screws: Heavy-duty galvanized screws (3-inch or longer) are usually sufficient. Alternatively, you can use metal corner brackets for extra stability. \n
- Drill: With a Phillips head bit for screws. \n
- Measuring Tape: For accurate cuts. \n
- Saw: A hand saw, circular saw, or miter saw will work. If you buy pre-cut lumber, you might not even need one! \n
- Level: To ensure your bed is even. \n
- Optional: Landscape fabric or cardboard for the bottom to suppress weeds. \n
Step-by-Step Guide to Building Your Raised Garden Bed
\n\n- \n
- Choose Your Spot: Pick a sunny location that gets at least 6-8 hours of direct sunlight daily. Ensure it's relatively level. \n
- Measure and Cut Lumber: If your lumber isn't pre-cut, measure and cut your pieces to the desired length (e.g., two 8-foot and two 4-foot pieces for a 4x8 bed). \n
- Assemble the Frame: Lay out your lumber in a rectangle. Using your drill and screws, attach the shorter pieces to the ends of the longer pieces, forming a rectangular frame. Make sure the corners are square. If using corner brackets, attach them to the inside or outside corners. \n
- Stack for Height (Optional): If you want a taller bed, repeat step 3 and stack the second frame directly on top of the first. Secure the layers together with longer screws or additional brackets. \n
- Level the Bed: Place your raised bed in its final location. Use a level to ensure it's sitting evenly. If not, you can slightly dig out high spots or add soil under low spots. \n
- Prepare the Base (Optional): Lay down a layer of cardboard or landscape fabric at the bottom of the bed to prevent weeds from growing up through your new soil. This also helps retain moisture. \n
- Fill with Soil: This is the fun part! Fill your raised bed with a high-quality raised bed mix. A good mix usually consists of compost, topsoil, and some perlite or vermiculite for drainage. \n
- Plant Away!: Now your raised bed is ready for planting! \n
Recommended Products for Your Raised Garden Bed Project
\n\nWhile you can source materials locally, here are some popular and reliable options:
\n\n- \n
- For Lumber: Look for untreated cedar or redwood at your local Home Depot, Lowe's, or a specialized lumber yard. Prices vary by region and wood type, but expect to pay around $15-$30 for an 8-foot 2x6 cedar board. \n
- Screws: Deckmate 3-inch Exterior Screws (approx. $15 for a 1lb box). These are designed for outdoor use and resist rust. Available at hardware stores. \n
- Drill: If you don't have one, a basic cordless drill like the Black+Decker 20V MAX Cordless Drill/Driver (approx. $50-$70) is perfect for beginner DIY projects. \n
- Raised Bed Soil Mix: Brands like Miracle-Gro Raised Bed Soil (approx. $10-$15 per 1.5 cu ft bag) or Kellogg Garden Organics Raised Bed & Potting Mix (similar price range) are readily available. You'll need several bags depending on the size of your bed. For a 4x8x0.5 ft bed, you'd need about 16 cubic feet of soil. \n
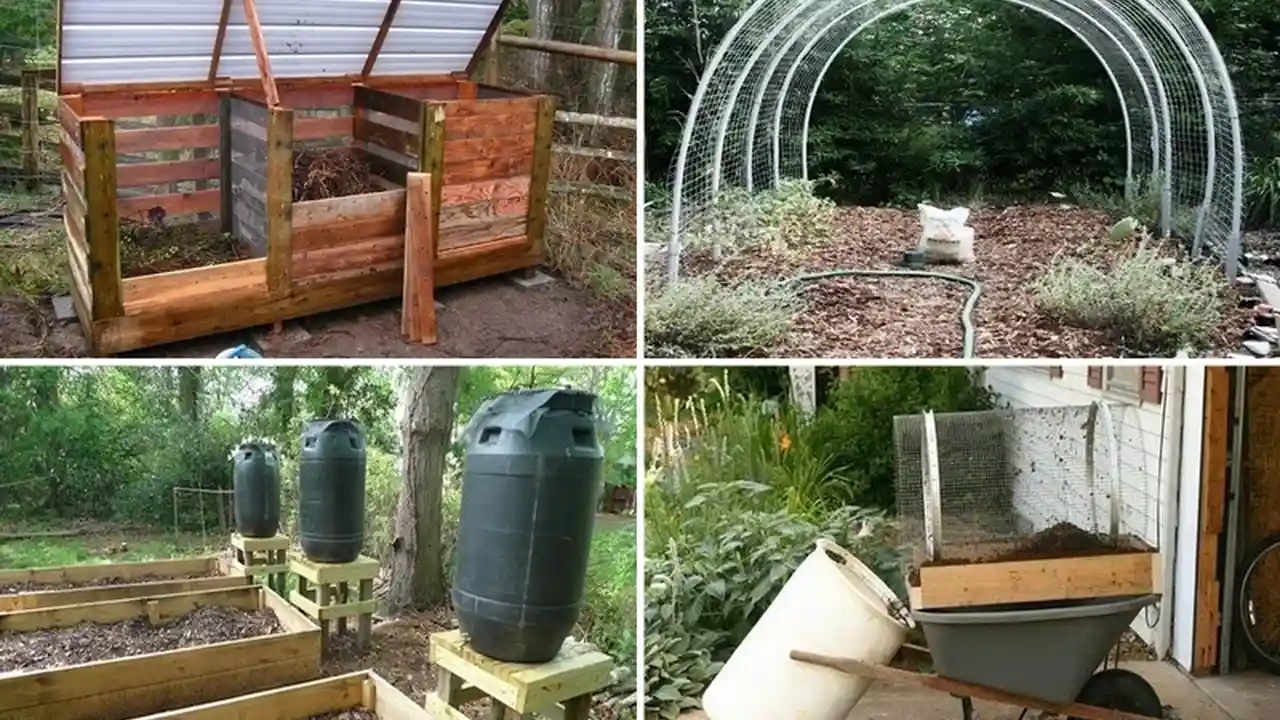
2. DIY Vertical Pallet Garden Maximizing Small Spaces
\n\nGot a small patio, balcony, or just a tiny patch of yard? A vertical pallet garden is your new best friend! It's an ingenious way to grow herbs, strawberries, or small flowers using reclaimed materials. Plus, it adds a rustic, charming touch to any space.
\n\nBenefits of a Vertical Pallet Garden for Urban Gardeners
\n\n- \n
- Space Saving: The most obvious benefit! Grow more in a compact footprint. \n
- Accessibility: Plants are at a comfortable height, making planting, watering, and harvesting easier. \n
- Aesthetic Appeal: Pallet gardens have a unique, upcycled look that can be quite stylish. \n
- Mobility: If you add casters, you can move your garden to follow the sun or protect it from harsh weather. \n
Materials You'll Need for Your DIY Vertical Pallet Garden
\n\n- \n
- Wooden Pallet: This is the star of the show! Look for heat-treated (HT stamp) pallets, not chemically treated (MB stamp). You can often find these for free at local businesses, construction sites, or even on Craigslist. \n
- Landscape Fabric or Burlap: About 3-4 yards, depending on the size of your pallet. \n
- Staple Gun and Staples: For attaching the fabric. \n
- Scissors: For cutting the fabric. \n
- Potting Mix: A good quality all-purpose potting mix. \n
- Plants: Herbs, small flowers, or shallow-rooted vegetables like lettuce or strawberries. \n
- Optional: Sandpaper, paint/stain, casters (wheels). \n
Step-by-Step Guide to Building Your Vertical Pallet Garden
\n\n- Source Your Pallet: As mentioned, look for HT (heat-treated) pallets. Avoid MB (methyl bromide) treated pallets as they contain chemicals.
- Clean and Prepare: Give your pallet a good scrub with soap and water, then let it dry completely. If you want a smoother finish or a different color, sand it down and apply a non-toxic paint or stain.
- Create Pockets: Lay the pallet flat with the wider slat openings facing up. These will be your planting pockets.
- Staple the Fabric: Take your landscape fabric or burlap. For each 'pocket' (the space between the slats), you'll need to create a pouch. Start by stapling the fabric to the inside of the bottom slat, then bring it up and over the next slat, stapling it securely to create a 'floor' for your pocket. Continue this for all the open slats, creating individual planting areas. Make sure the fabric is taut and secure to hold the soil.
- Fill with Soil: Once all your pockets are formed, stand the pallet upright. Carefully fill each fabric pocket with your potting mix. Don't overfill, leave some space for your plants.
- Plant Your Goodies: Now, gently plant your chosen herbs, flowers, or veggies into each pocket. Water them in thoroughly.
- Find the Perfect Spot: Place your vertical garden in a sunny location. If you added casters, you can easily move it around.
Recommended Products for Your Vertical Pallet Garden Project
- Staple Gun: A basic manual staple gun like the Arrow Fastener T50 Staple Gun (approx. $20-$30) is perfect for this.
- Landscape Fabric: Vigoro Landscape Fabric (approx. $15-$25 for a roll) is widely available at garden centers. Burlap can also be found at craft stores or garden centers.
- Potting Mix: Miracle-Gro Potting Mix or FoxFarm Ocean Forest Potting Soil (approx. $10-$20 per bag) are excellent choices for container gardening.
- Casters (Optional): If you want mobility, a set of Swivel Plate Casters (approx. $15-$25 for a set of 4) can be screwed to the bottom of the pallet.
3. DIY Stepping Stones Adding Whimsy and Function
Stepping stones are a fantastic way to create pathways, define garden beds, or simply add decorative elements to your outdoor space. Making your own is surprisingly easy and allows for endless creativity. You can embed leaves, mosaic pieces, or even handprints!
Benefits of DIY Stepping Stones for Garden Pathways
- Personalization: Create unique designs that reflect your style.
- Cost-Effective: Often cheaper than buying pre-made stepping stones.
- Functionality: Provide stable pathways, keeping your feet clean and protecting your plants.
- Durability: Properly made concrete stepping stones can last for years.
Materials You'll Need for Your DIY Stepping Stone Project
- Concrete Mix: A bag of quick-setting concrete mix (e.g., Quikrete Fast-Setting Concrete Mix). One 50lb bag can make several stones depending on size.
- Molds: You can buy plastic stepping stone molds (various shapes and sizes), or get creative with household items like old plastic containers, pie tins, or even a sturdy cardboard box lined with plastic wrap.
- Water: For mixing the concrete.
- Mixing Bucket or Wheelbarrow: For mixing the concrete.
- Trowel or Shovel: For mixing and smoothing.
- Gloves: Concrete can be irritating to skin.
- Decorations (Optional): Pebbles, glass gems, mosaic tiles, leaves, handprints, small trinkets.
- Cooking Spray or Vaseline: To grease the molds for easy release.
Step-by-Step Guide to Making Your Stepping Stones
- Prepare Your Molds: Lightly grease the inside of your molds with cooking spray or Vaseline. This will make it much easier to remove the finished stepping stone.
- Mix the Concrete: Follow the instructions on your concrete mix bag. Typically, you'll add water gradually to the dry mix in your bucket or wheelbarrow, mixing thoroughly with a trowel or shovel until it reaches a consistency similar to thick oatmeal or peanut butter. It should be wet enough to work with but not soupy.
- Pour into Molds: Carefully pour the concrete mix into your prepared molds. Fill them to your desired thickness (usually 1.5 to 2 inches for durability).
- Smooth and Decorate: Use your trowel to smooth the top surface of the concrete. This is where the fun begins! If you're adding decorations, gently press them into the wet concrete. For leaves, press them down, then remove them after a few hours to leave an imprint. For handprints, wait until the concrete is firm but still pliable (usually 30-60 minutes after pouring) and press your hand firmly.
- Cure the Concrete: This is crucial for strength. Cover the molds with plastic sheeting or a damp cloth to keep the concrete moist. Allow them to cure for at least 24-48 hours, or as directed on the concrete mix bag. For best results, keep them moist for several days.
- Demold: Once fully cured, carefully remove the stepping stones from their molds. They might be a bit heavy, so handle with care.
- Place in Garden: Your custom stepping stones are now ready to be placed in your garden!
Recommended Products for Your Stepping Stone Project
- Concrete Mix: Quikrete Fast-Setting Concrete Mix (approx. $5-$8 for a 50lb bag). Available at all hardware stores.
- Stepping Stone Molds: You can find various plastic molds on Amazon or at craft stores. Search for 'stepping stone molds'. Prices range from $10-$30 per mold, depending on size and complexity. Alternatively, repurpose old plastic containers or even sturdy cardboard boxes lined with plastic wrap.
- Mixing Bucket: A 5-gallon bucket (approx. $5) from any hardware store.
- Trowel: A basic masonry trowel (approx. $10-$20) will do the trick.
- Decorative Elements: Craft stores like Michaels or Hobby Lobby have a wide selection of glass gems, mosaic tiles, and pebbles.
There you have it! Three fantastic DIY garden projects that are perfect for beginners. These projects are not just about creating something beautiful; they're about learning, experimenting, and connecting with your garden on a deeper level. So grab your tools, get a little messy, and enjoy the process of transforming your outdoor space into a personalized haven. Happy gardening!
} ] }:max_bytes(150000):strip_icc()/277019-baked-pork-chops-with-cream-of-mushroom-soup-DDMFS-beauty-4x3-BG-7505-5762b731cf30447d9cbbbbbf387beafa.jpg)