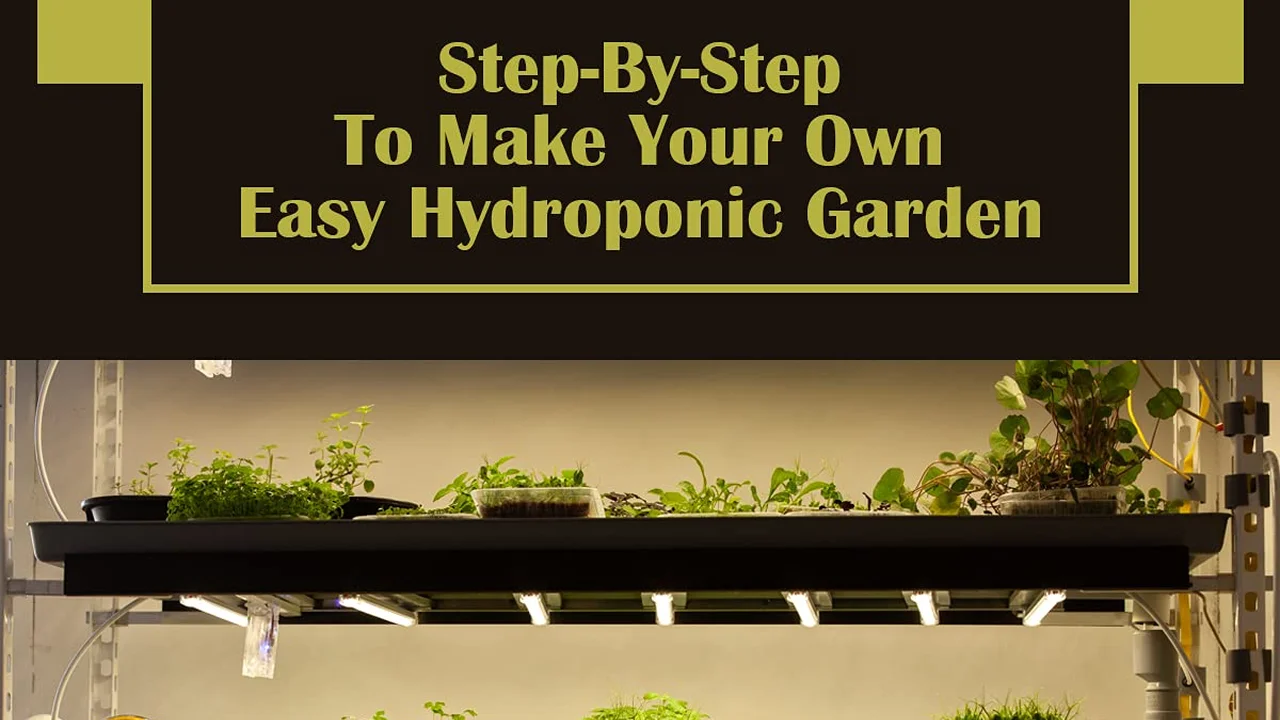
Hydroponics for Beginners 5 Essential Components
Explore the basics of hydroponics with these 5 essential components. Grow plants without soil in a controlled environment.
Explore the basics of hydroponics with these 5 essential components. Grow plants without soil in a controlled environment.
Hydroponics for Beginners 5 Essential Components
Hey there, aspiring green thumb! Ever dreamed of growing your own fresh produce, herbs, or even flowers without the mess of soil? Well, you're in luck because hydroponics is here to make that dream a reality. It might sound super high-tech, but at its core, hydroponics is simply growing plants in water enriched with nutrients. No dirt, no digging, just pure plant power. It's a fantastic way to garden, especially if you have limited space, want faster growth, or live in an urban area. Plus, it's incredibly water-efficient, using up to 90% less water than traditional soil gardening. Pretty cool, right?
So, you're probably wondering, "How do I even start with this soil-free magic?" Don't worry, I'm here to break it down for you. While there are many fancy hydroponic systems out there, they all rely on a few fundamental components. Understanding these basics is your first step to becoming a hydroponic pro. Think of it like learning the ABCs before you write a novel. Once you grasp these five essential components, you'll be well on your way to a thriving hydroponic garden.
The Nutrient Reservoir Your Plant's Lifeline
First up, let's talk about the heart of your hydroponic system: the nutrient reservoir. This is essentially a container that holds the water and all the yummy nutrients your plants need to grow. Think of it as your plant's personal pantry and hydration station rolled into one. The size of your reservoir will depend on the size of your system and how many plants you're growing. For beginners, a smaller reservoir (like a 5-gallon bucket or a 10-gallon tote) is a great starting point. As you get more comfortable, you can scale up.
Choosing the Right Reservoir Material and Size
When picking a reservoir, material matters. You want something opaque, meaning it doesn't let light through. Why? Because light encourages algae growth, and algae will compete with your plants for nutrients, which is a big no-no. Food-grade plastic containers are usually the best bet. Think about those dark blue or black totes you see at hardware stores. Avoid clear or translucent containers unless you plan to paint them or cover them completely to block out light.
For a small, beginner-friendly system with 1-2 plants, a 5-gallon bucket (around $5-$10) works perfectly. If you're looking to grow 3-6 plants, a 10-20 gallon storage tote (around $15-$30) is a good option. For larger setups, you might consider dedicated hydroponic reservoirs, which can range from 30 gallons to hundreds of gallons, costing anywhere from $50 to several hundred dollars. Remember, a larger reservoir means less frequent refilling and more stable nutrient levels, but it also takes up more space.
Maintaining Your Nutrient Solution pH and EC
Maintaining the nutrient solution is crucial. You'll need to monitor two key things: pH and Electrical Conductivity (EC). pH measures how acidic or alkaline your solution is, and EC measures the concentration of nutrients. Most plants prefer a slightly acidic pH, usually between 5.5 and 6.5. You'll need a pH meter (digital ones are best, around $15-$30) and pH Up/Down solutions (around $10-$20 per bottle) to adjust it. EC meters (also known as TDS meters, around $20-$40) tell you if your plants are getting enough food. It sounds complicated, but it becomes second nature quickly. You'll typically check these daily or every other day.
The Growing Medium Supporting Your Plants
Since there's no soil, your plants need something to anchor their roots and provide support. That's where the growing medium comes in. It's not just about holding the plant upright; it also helps with aeration and moisture retention around the roots. There are several popular choices, each with its own pros and cons.
Popular Growing Mediums for Hydroponics
- Rockwool: This is probably the most common and widely used medium, especially for starting seeds and clones. It's made from molten rock spun into fine fibers, creating a porous, airy structure. It holds water well but also provides excellent aeration. You can buy rockwool cubes in various sizes (a pack of 50 small cubes is around $10-$20). It's inert, meaning it doesn't add or subtract nutrients, which gives you precise control over your nutrient solution.
- Coco Coir: Derived from coconut husks, coco coir is a sustainable and environmentally friendly option. It has excellent water retention and aeration properties, similar to soil but without the soil-borne diseases. It's often sold in compressed bricks (a 5kg brick for around $15-$25) that expand significantly when hydrated. It's a bit more forgiving than rockwool for beginners.
- Clay Pebbles (Hydroton): These are lightweight, expanded clay aggregates. They're porous, reusable, and provide fantastic aeration to the roots. They don't hold much water themselves, so they're often used in systems where the roots are constantly exposed to the nutrient solution, like DWC (Deep Water Culture) or ebb and flow systems. A 10L bag costs around $20-$30. They're great for larger plants and systems.
- Perlite and Vermiculite: These are lightweight, volcanic minerals. Perlite offers excellent drainage and aeration, while vermiculite retains water. They are often used in mixes or as top layers. A large bag of perlite or vermiculite can be found for $15-$30.
- Net Pots: While not a medium itself, net pots are essential for holding your growing medium and plant in place, allowing the roots to grow out into the nutrient solution. They come in various sizes (a pack of 20 2-inch net pots is around $10-$15).
For beginners, I'd recommend starting with rockwool cubes for seed starting and then transplanting into a system using clay pebbles or coco coir. Experiment to see what works best for your specific setup and plants.
The Nutrient Solution Your Plant's Food
This is where the magic happens! In hydroponics, your plants get all their essential nutrients directly from the water. This means you need a specially formulated hydroponic nutrient solution, not just regular fertilizer you'd use for soil plants. Hydroponic nutrients contain all the macro and micronutrients plants need in a readily available form.
Types of Hydroponic Nutrients and Brands
Hydroponic nutrients typically come in two or three parts (e.g., 'Grow,' 'Bloom,' and 'Micro'). This allows you to adjust the nutrient ratios based on the plant's growth stage (vegetative growth vs. flowering/fruiting). Some popular and reliable brands include:
- General Hydroponics Flora Series: This is a very popular 3-part system (FloraGro, FloraMicro, FloraBloom) and a fantastic choice for beginners. It's widely available and comes with clear feeding charts. A liter of each part costs around $20-$30, so a full set is about $60-$90.
- Advanced Nutrients pH Perfect Series: This brand is known for its 'pH Perfect' technology, which claims to automatically adjust your pH, making it easier for beginners. They have various specialized formulas. A basic starter kit can be around $100-$200.
- FoxFarm Liquid Nutrient Trio: Another popular choice, especially for those looking for more organic-based options. Their 'Grow Big,' 'Tiger Bloom,' and 'Big Bloom' are well-regarded. A set of three 1-quart bottles is around $40-$60.
Always follow the manufacturer's instructions for mixing the nutrients. Over-fertilizing can burn your plants, and under-fertilizing will lead to stunted growth. Start with a lower concentration than recommended and gradually increase it as your plants grow and you get a feel for their needs.
The Water Pump and Air Pump Essential Circulation
For most hydroponic systems, you'll need a way to circulate the nutrient solution and oxygenate it. This is where the water pump and air pump come in. They're like the circulatory and respiratory systems for your hydroponic garden.
Water Pumps for Nutrient Delivery
A submersible water pump is used to move the nutrient solution from the reservoir to the plants. This is crucial for systems like Drip Systems, NFT (Nutrient Film Technique), and Ebb and Flow. The size of the pump you need depends on the height you need to pump the water and the flow rate required. Look for pumps designed for hydroponics or aquariums. A small, reliable submersible pump can cost anywhere from $15-$40. For example, a VIVOSUN 800GPH Submersible Water Pump (around $25 on Amazon) is a good all-rounder for many beginner setups, offering adjustable flow and decent lift.
Air Pumps and Air Stones for Oxygenation
Roots need oxygen to thrive, just like we do! In a hydroponic system, especially Deep Water Culture (DWC) where roots are submerged, an air pump and air stone are vital. The air pump pushes air through a tube to the air stone, which then creates tiny bubbles in the nutrient solution, dissolving oxygen into the water. Without enough oxygen, your roots can 'drown' and develop root rot. A good quality air pump (like the Tetra Whisper Air Pump, around $10-$20 for a small one) and an air stone (around $5-$10 for a pack) are essential investments. For a 5-gallon bucket DWC system, a single outlet air pump and a 4-inch air stone are usually sufficient.
Lighting The Sun's Replacement
Unless you're growing outdoors in a perfectly sunny spot, you'll need artificial lighting to provide your plants with the energy they need for photosynthesis. This is one of the most critical and often most expensive components, but it's non-negotiable for healthy plant growth indoors.
Types of Grow Lights for Hydroponics
- LED Grow Lights: These are the most popular choice for beginners and experienced growers alike. They are energy-efficient, produce less heat, and have a long lifespan. They come in various spectrums (full-spectrum is best for general growth) and wattages. For a small setup (1-2 plants), a Mars Hydro TS 600W LED Grow Light (around $70-$100) is an excellent entry-level option, providing good coverage and spectrum. For a slightly larger setup (2x2 or 2x4 foot tent), a Spider Farmer SF1000 LED Grow Light (around $150-$200) offers superior performance and efficiency.
- Fluorescent Lights (T5s): These are good for starting seeds, clones, and growing leafy greens or herbs. They are less expensive upfront but less powerful than LEDs for flowering plants. A 2-foot, 4-bulb T5 fixture can cost around $50-$80.
- High-Intensity Discharge (HID) Lights (MH/HPS): These are very powerful and efficient for larger grows, but they produce a lot of heat and consume more electricity. They are generally not recommended for beginners due to their complexity and heat management requirements.
When choosing a light, consider the wattage and the coverage area. You'll also need a timer (a simple mechanical timer is around $10, digital ones $15-$25) to set your light cycles (e.g., 16 hours on, 8 hours off for vegetative growth; 12 hours on, 12 hours off for flowering).
Putting It All Together A Simple DWC System Example
Now that you know the five essential components, let's briefly look at how they come together in a simple Deep Water Culture (DWC) system, which is often recommended for beginners due to its simplicity and effectiveness.
- Reservoir: A 5-gallon opaque bucket.
- Growing Medium: A net pot filled with clay pebbles, holding your plant (started in a rockwool cube).
- Nutrient Solution: Water mixed with your chosen hydroponic nutrients, filling the bucket.
- Water Pump/Air Pump: An air pump connected to an air stone at the bottom of the bucket, bubbling oxygen into the nutrient solution. (No water pump needed for DWC as roots are submerged).
- Lighting: An LED grow light suspended above your plant, on a timer.
That's it! Your plant's roots will dangle directly into the oxygenated nutrient solution, absorbing everything they need to grow big and strong. It's a beautiful, efficient cycle.
Beyond the Basics Monitoring and Maintenance
While these five components are essential, successful hydroponics also involves consistent monitoring and maintenance. Here are a few extra tips to keep your system humming:
- pH and EC Meters: As mentioned, these are your best friends. Check them daily and adjust as needed.
- Temperature: Keep your nutrient solution temperature between 65-75°F (18-24°C). Too warm can lead to root rot, too cold can slow growth. A small aquarium heater (around $15-$30) can help if your environment is too cold.
- Reservoir Changes: You'll need to completely change out your nutrient solution every 1-2 weeks to prevent nutrient imbalances and pathogen buildup.
- Cleaning: Regularly clean your reservoir and system components to prevent algae and bacterial growth.
- Pest and Disease Management: Even without soil, hydroponic plants can still get pests or diseases. Regular inspection and prompt action are key.
Hydroponics is a rewarding journey. It allows you to grow fresh, healthy produce year-round, often with faster growth rates and higher yields than traditional gardening. Don't be intimidated by the initial setup. Start small, learn as you go, and enjoy the process of watching your plants thrive in their soil-free environment. Happy growing!
:max_bytes(150000):strip_icc()/277019-baked-pork-chops-with-cream-of-mushroom-soup-DDMFS-beauty-4x3-BG-7505-5762b731cf30447d9cbbbbbf387beafa.jpg)