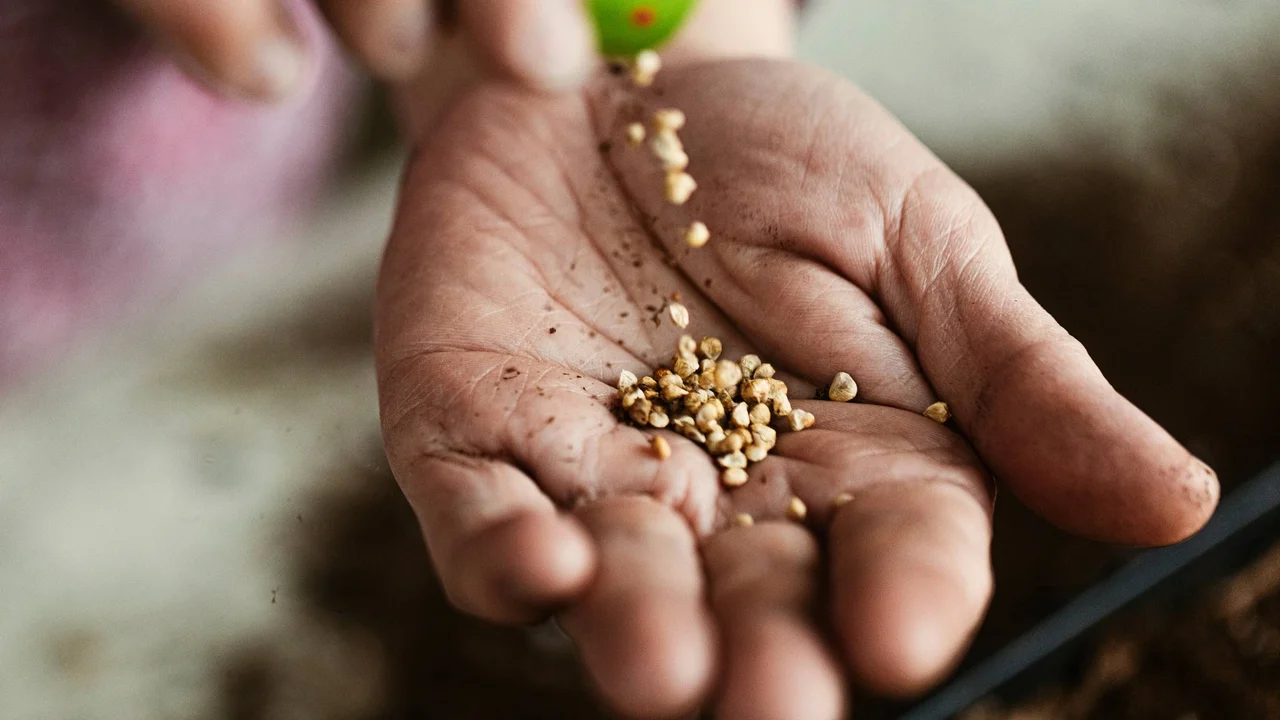
Seed Starting Indoors 6 Essential Tips
Master indoor seed starting with these 6 essential tips. Get a head start on your gardening season for healthier plants.
Master indoor seed starting with these 6 essential tips. Get a head start on your gardening season for healthier plants.
Seed Starting Indoors 6 Essential Tips
Hey there, fellow green thumbs! Are you itching to get your garden growing even when the weather outside is still playing hard to get? Starting seeds indoors is your secret weapon. It’s not just about getting a head start; it’s about having more control over your plant varieties, saving some cash, and honestly, it’s just incredibly satisfying to watch those tiny sprouts emerge. But let's be real, it can feel a bit daunting at first. Don't sweat it! I'm here to walk you through six essential tips that will turn you into an indoor seed-starting pro. We'll cover everything from the right gear to common pitfalls, and even recommend some specific products to make your life easier.
1. Choosing the Right Seed Starting Mix and Containers for Optimal Growth
First things first, let's talk about what your little seeds will call home. You might be tempted to just grab some garden soil, but trust me, that's a no-go for indoor seed starting. Garden soil is too heavy, can compact easily, and often contains weed seeds or pathogens that you definitely don't want in your delicate seedlings. What you need is a specialized seed starting mix.
Why Seed Starting Mix is Your Best Friend
A good seed starting mix is sterile, lightweight, and has excellent drainage while still retaining enough moisture. It's usually a blend of peat moss or coco coir, perlite, and vermiculite. This combination provides the perfect airy environment for tiny roots to develop without getting waterlogged. Think of it as a fluffy, clean bed for your baby plants.
Recommended Seed Starting Mixes and Their Benefits
- Jiffy Seed Starting Mix: This is a classic for a reason. It's widely available, affordable, and consistently performs well. It's usually peat-based and very fine, which is great for small seeds. You can find a 16-quart bag for around $10-$15.
- Espoma Organic Seed Starter Mix: If you're leaning organic, Espoma is a fantastic choice. It's OMRI listed, meaning it's certified for organic use, and often includes mycorrhizal fungi to help with nutrient uptake. A 16-quart bag might run you $15-$20.
- FoxFarm Ocean Forest Potting Soil (for larger seeds/transplants): While not strictly a seed starting mix, once your seedlings have their first true leaves, you might want to pot them up into something a bit richer. FoxFarm Ocean Forest is a popular choice for its nutrient content and excellent drainage. A 1.5 cubic foot bag is typically $20-$30.
Container Options: From DIY to Dedicated Trays
Now, for the containers. You've got a ton of options, from repurposing household items to buying specialized trays. The key is good drainage and adequate depth for root development.
- Seed Starting Trays with Domes: These are probably the most popular choice for beginners. They come with individual cells, a base tray for watering, and a clear dome to create a mini-greenhouse effect, which is crucial for germination. They range from 12-cell to 72-cell configurations. A basic 72-cell tray with a dome can be found for $5-$10.
- Peat Pots or Coir Pellets: These are biodegradable pots that you can plant directly into the ground, minimizing transplant shock. They're great for plants that don't like their roots disturbed, like cucumbers or squash. A pack of 100 peat pots (2.25-inch) is usually $10-$15. Jiffy pellets (compressed peat or coir) are also super convenient; just add water and they expand. A pack of 50 can be $8-$12.
- Recycled Containers: Don't want to spend extra cash? Yogurt cups, milk jugs (cut in half), or even toilet paper rolls can work! Just make sure to poke drainage holes in the bottom. This is a super budget-friendly option, costing you nothing but a little time.
Comparison of Container Types:
| Container Type | Pros | Cons | Typical Cost |
|---|---|---|---|
| Seed Starting Trays with Domes | Excellent humidity control, easy to organize, reusable. | Can be flimsy, requires potting up. | $5-$15 per tray set |
| Peat Pots/Coir Pellets | Reduces transplant shock, biodegradable. | Can dry out quickly, sometimes roots struggle to penetrate. | $8-$15 per pack |
| Recycled Containers | Free, eco-friendly, customizable. | Requires drainage holes, less uniform, can be messy. | Free |
2. Providing Adequate Light for Strong Seedling Development
This is where many beginners stumble. Your seedlings need a LOT of light – way more than a sunny windowsill can provide, especially in early spring. Without enough light, your seedlings will become leggy and weak, stretching desperately towards the light source. This is called etiolation, and it's not what you want.
The Importance of Grow Lights for Indoor Seed Starting
Grow lights are essential for robust, healthy seedlings. They provide the full spectrum of light that plants need for photosynthesis. You'll want to keep your grow lights very close to your seedlings, typically just 2-4 inches above the tops of the plants, and adjust them as the plants grow. Aim for 14-16 hours of light per day, followed by 8-10 hours of darkness.
Recommended Grow Light Options and Their Price Points
- Fluorescent Shop Lights (T5 or T8): These are a fantastic budget-friendly option for beginners. T5 bulbs are more efficient and brighter than T8s. You can get a 4-foot, 2-bulb T5 fixture for around $40-$70. They emit a good spectrum for vegetative growth.
- LED Grow Lights (Full Spectrum): LEDs are becoming increasingly popular due to their energy efficiency, long lifespan, and customizable spectrums. While the initial cost can be higher, they save money in the long run. A good quality full-spectrum LED panel suitable for a small seed starting setup might cost $50-$150. Look for brands like Barrina (for basic strip lights, around $30 for a 6-pack) or Spider Farmer (for more powerful panels, starting around $80-$100).
- Comparison of Grow Light Types:
| Light Type | Pros | Cons | Typical Cost |
|---|---|---|---|
| Fluorescent (T5/T8) | Affordable, low heat, good for seedlings. | Less energy efficient than LED, bulbs need replacing. | $40-$70 per fixture |
| LED (Full Spectrum) | Energy efficient, long lifespan, low heat, customizable spectrum. | Higher upfront cost. | $50-$150+ per panel |
Setting Up Your Grow Light System for Maximum Efficiency
You'll want to hang your lights using adjustable chains or ropes so you can easily raise them as your seedlings grow. A simple shelving unit can be transformed into a seed-starting station with a few fixtures. Consider adding a timer (around $10-$15) to automate your light schedule – it's a game-changer!
3. Mastering Watering Techniques for Healthy Seedlings
Watering might seem straightforward, but it's actually one of the trickiest parts of indoor seed starting. Too much water leads to damping-off disease (a fungal issue that causes seedlings to collapse at the soil line), and too little leads to wilting and stunted growth. It's a delicate balance!
Bottom Watering vs Top Watering: Which is Best for Seedlings?
For seedlings, bottom watering is generally preferred. This means placing your seed trays in a larger tray filled with about an inch of water. The soil mix will wick up the water from the bottom, ensuring even moisture and encouraging roots to grow downwards. It also keeps the surface of the soil drier, which helps prevent damping-off.
If you do top water, use a gentle stream or a spray bottle to avoid disturbing the tiny seeds or delicate seedlings. Always water thoroughly until you see water draining from the bottom, then let any excess drain away.
Tools for Precise Watering and Moisture Monitoring
- Watering Can with a Fine Rose: A small watering can with a very fine, gentle spray attachment is perfect for top watering without washing away seeds. Look for one with a long, narrow spout for precision. A good quality one can be found for $15-$25.
- Spray Bottle: For very young seedlings or just misting the surface to keep it moist, a simple spray bottle works wonders. You can get a decent one for $5-$10.
- Moisture Meter: While not strictly necessary, a moisture meter (around $10-$20) can take the guesswork out of watering. Stick it into the soil, and it will tell you if it's wet, moist, or dry.
Signs of Overwatering and Underwatering in Young Plants
- Overwatering: Yellowing leaves, stunted growth, wilting (even though the soil is wet), fuzzy mold on the soil surface, and the dreaded damping-off.
- Underwatering: Drooping or crispy leaves, dry and crumbly soil, slow growth.
The best way to tell if your seedlings need water is to feel the weight of the tray. A dry tray will feel surprisingly light. You can also stick your finger about an inch into the soil; if it feels dry, it's time to water.
4. Managing Temperature and Humidity for Successful Germination
Temperature and humidity are critical for seed germination. Most seeds need warmth to sprout, and consistent moisture in the air helps prevent the seed starting mix from drying out too quickly.
Ideal Temperature Ranges for Seed Germination
Most vegetable and flower seeds germinate best when the soil temperature is between 65-75°F (18-24°C). Some, like peppers and tomatoes, prefer it a bit warmer, up to 80-85°F (27-29°C). Others, like lettuce and spinach, prefer cooler temperatures. Always check your seed packet for specific recommendations.
The Role of Heat Mats and Humidity Domes in Seed Starting
- Heat Mats: These are a game-changer for speeding up germination, especially for warmth-loving plants. They sit under your seed trays and provide gentle, consistent bottom heat. A standard heat mat (10x20 inches) can be purchased for $20-$40. Some come with thermostats for precise temperature control (add another $10-$20).
- Humidity Domes: These clear plastic covers come with most seed starting trays and are essential for maintaining high humidity around your seeds. They trap moisture, creating a mini-greenhouse effect that prevents the soil from drying out and encourages germination. Once seeds sprout, you'll want to remove or vent the dome to increase air circulation and prevent fungal issues.
Monitoring and Adjusting Environmental Conditions
A simple thermometer/hygrometer (around $10-$15) can help you monitor both temperature and humidity in your seed starting area. If humidity is too low, you can mist the air around your seedlings or place a tray of pebbles with water nearby. If it's too high after germination, remove the dome or use a small fan to improve air circulation.
5. Fertilizing and Potting Up Your Growing Seedlings
Once your seedlings have emerged and developed their first set of true leaves (the leaves that appear after the initial 'cotyledon' leaves), they'll start needing some nutrients. The seed starting mix usually doesn't contain much, if any, fertilizer.
When and How to Fertilize Young Seedlings
Start fertilizing when your seedlings have their first set of true leaves. Use a very diluted liquid fertilizer – about 1/4 to 1/2 strength of what's recommended for mature plants. Fertilize every 1-2 weeks. Over-fertilizing can burn delicate roots, so err on the side of caution.
Recommended Fertilizers for Seedlings
- Alaska Fish Emulsion: This is an organic, all-purpose liquid fertilizer that's great for seedlings. It has a strong smell, but it's very effective. A 1-quart bottle is around $10-$15.
- Dyna-Gro Grow: A synthetic, balanced liquid fertilizer that's highly concentrated. A little goes a long way. A 1-quart bottle is typically $20-$30.
- General Hydroponics FloraGro: Another popular synthetic option, often used in hydroponics but also great for soil-grown seedlings. Part of a 3-part system, but FloraGro alone can be used for vegetative growth. A 1-quart bottle is around $15-$20.
The Process of Potting Up for Continued Growth
When your seedlings start to outgrow their initial cells (roots are visible at the bottom, or they're getting crowded), it's time to 'pot up' to larger containers. This gives their roots more space to grow and access to fresh nutrients.
- Gently remove the seedling from its current container, trying not to disturb the roots too much.
- Prepare a new pot (3-4 inches in diameter is usually a good next step) with a slightly richer potting mix (like the FoxFarm Ocean Forest mentioned earlier, or a general organic potting mix).
- Make a hole in the center of the new pot, place the seedling in, and backfill with soil, gently firming it around the base. For tomatoes and some other plants, you can bury part of the stem to encourage more root growth.
- Water thoroughly after potting up.
6. Hardening Off Your Seedlings for Outdoor Success
This is a crucial step that many beginners skip, often with disastrous results. Your indoor-grown seedlings are pampered. They've lived in a controlled environment with perfect temperatures, consistent light, and no wind or harsh sun. If you just plop them directly into your garden, they'll go into shock and likely die.
What is Hardening Off and Why is it Essential?
Hardening off is the process of gradually acclimating your seedlings to outdoor conditions. It toughens them up, making them more resilient to wind, direct sunlight, fluctuating temperatures, and less consistent watering. This process typically takes 7-14 days.
A Step-by-Step Guide to Hardening Off Your Plants
- Day 1-3: Place your seedlings in a sheltered, shady spot outdoors for 1-2 hours. Think a porch, under a tree, or on the north side of your house. Bring them in at night.
- Day 4-6: Increase their outdoor time to 3-4 hours, and move them to a spot that gets a bit more morning sun (but still protected from harsh afternoon sun).
- Day 7-9: Extend their time outdoors to 6-8 hours, gradually exposing them to more direct sunlight.
- Day 10-14: If temperatures are consistently above 50°F (10°C) at night, you can start leaving them out overnight in a protected spot. Continue to expose them to full sun for longer periods.
Tips for a Smooth Transition to the Outdoor Garden
- Check the weather: Avoid hardening off during extreme heat, cold snaps, or very windy days.
- Water regularly: Seedlings can dry out faster outdoors. Keep an eye on their moisture levels.
- Don't rush it: Patience is key. A slow, gradual process will yield the best results.
- Plant on a cloudy day: When it's finally time to transplant them into the garden, choose a cloudy day or do it in the late afternoon to minimize transplant shock.
By following these six essential tips, you'll be well on your way to a successful indoor seed starting season. It takes a little practice, but the reward of nurturing your own plants from tiny seed to thriving garden specimen is truly unmatched. Happy growing!
:max_bytes(150000):strip_icc()/277019-baked-pork-chops-with-cream-of-mushroom-soup-DDMFS-beauty-4x3-BG-7505-5762b731cf30447d9cbbbbbf387beafa.jpg)