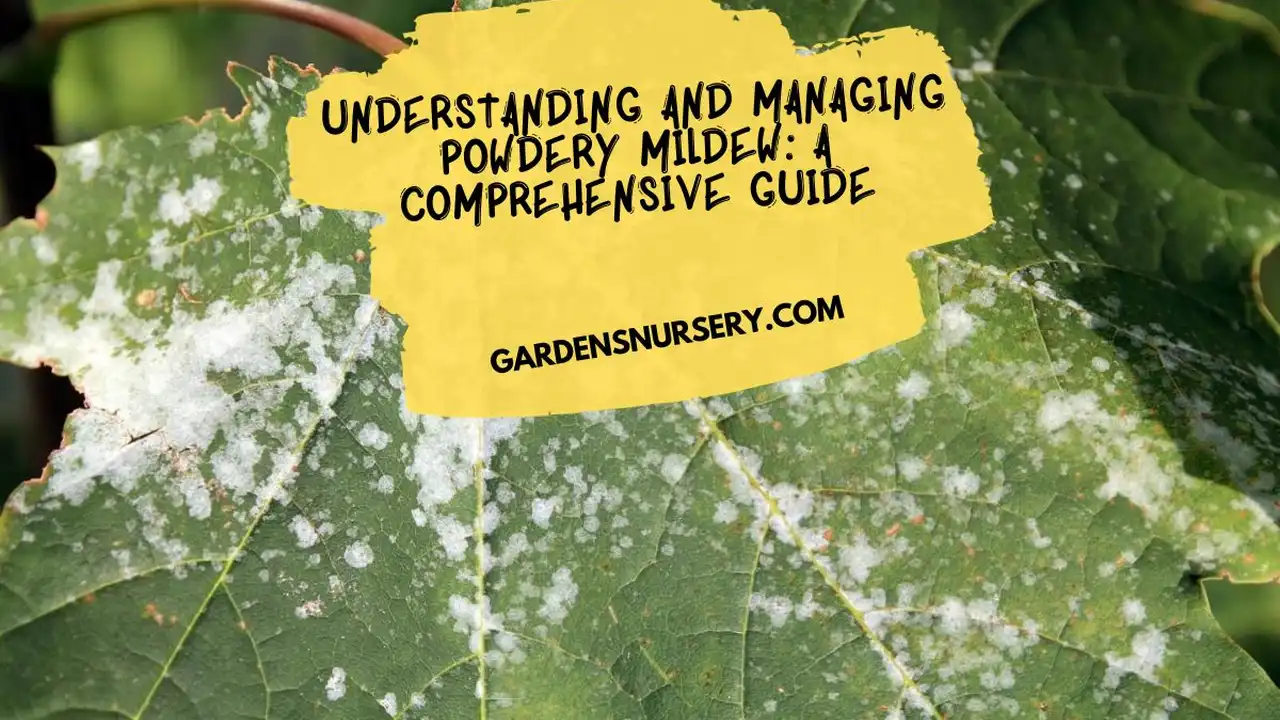
Dealing with Powdery Mildew 3 Effective Treatments
Prepare your flower beds for winter with these 4 essential steps. Protect your plants for next spring's blooms.

Winterizing Your Flower Beds 4 Key Steps
As the vibrant colors of summer and autumn begin to fade, many gardeners might feel a pang of sadness, thinking their gardening season is drawing to a close. But hold on! Winterizing your flower beds isn't just about putting your garden to sleep; it's about setting it up for spectacular success next spring. Think of it as a crucial hibernation period, where your plants gather strength and resilience to burst forth with renewed vigor when warmer days return. This comprehensive guide will walk you through four essential steps to ensure your flower beds are not only protected from winter's harsh embrace but are also primed for an explosion of blooms come springtime. We'll dive deep into each step, offering practical advice, product recommendations, and comparisons to help you make the best choices for your garden.
Understanding Winter's Impact on Flower Beds
Before we jump into the 'how-to,' let's briefly understand 'why.' Winter, with its freezing temperatures, biting winds, and often heavy snow, can be incredibly stressful for plants. Freezing and thawing cycles can heave plants out of the ground, exposing their roots. Cold winds can desiccate evergreen foliage, and heavy snow can break branches. Without proper preparation, many perennial flowers and shrubs can suffer significant damage, or even die. Winterizing helps mitigate these risks, providing insulation, protection, and essential nutrients to see your plants through the dormant season.
Step 1: The Big Clean Up Clearing Debris and Weeds for Winter Protection
The first and arguably most important step in winterizing your flower beds is a thorough clean-up. This isn't just about aesthetics; it's about preventing diseases and pests from overwintering in your garden. Decaying plant material, fallen leaves, and persistent weeds can harbor fungal spores, insect eggs, and other pathogens that will happily emerge in spring to wreak havoc on your new growth.
Why Clean Up Matters for Winter Flower Beds
- Disease Prevention: Many fungal diseases, like powdery mildew or black spot, can survive winter on infected plant debris. Removing this material breaks their life cycle.
- Pest Control: Slugs, snails, and various insect larvae often seek shelter in leaf litter and plant stems. A clean bed offers them fewer hiding spots.
- Improved Air Circulation: Removing dense debris allows for better air circulation around the crowns of your plants, reducing the risk of rot.
- A Tidy Start: A clean bed in fall means less work in spring, allowing you to focus on planting and enjoying your garden sooner.
How to Clean Up Your Flower Beds Effectively
Start by removing all spent annuals. These plants have completed their life cycle and will not return. For perennials, the approach varies. Some, like hostas or peonies, can be cut back to the ground once their foliage dies back naturally. Others, like ornamental grasses or coneflowers, can be left standing to provide winter interest and food for birds, and then cut back in early spring. Always remove any plant material that shows signs of disease or heavy pest infestation; these should be bagged and disposed of, not composted, to prevent spreading issues.
Weeding is also crucial. Perennial weeds, especially, can continue to grow and spread their root systems underground, making them harder to control in spring. Pull them out by hand, ensuring you get as much of the root as possible. For larger areas, a garden hoe can be effective, but be careful not to disturb the roots of your desired plants.
Recommended Tools for Clean Up
- Garden Gloves: Protect your hands from thorns, dirt, and potential irritants. Look for durable, waterproof options.
- Hand Pruners: Essential for cutting back dead or diseased stems.
- Garden Fork or Trowel: Useful for digging out stubborn weeds.
- Wheelbarrow or Garden Cart: For easily transporting debris to your compost pile or disposal area.
Product Spotlight: Best Pruners for Garden Clean Up
When it comes to pruners, quality makes a difference. You want something sharp, comfortable, and durable.
- Fiskars Bypass Pruners (around $20-$30): A popular choice for beginners and experienced gardeners alike. They are lightweight, sharp, and great for cutting live stems cleanly. Their ergonomic design reduces hand fatigue. Ideal for general clean-up and light pruning.
- Felco F-2 Classic Bypass Pruner (around $70-$90): A professional-grade option, known for its exceptional durability, replaceable parts, and precise cutting. While more expensive, these will last a lifetime with proper care. Best for those who garden frequently and want a tool that can handle tougher stems.
- Corona BP 3180 Bypass Pruner (around $25-$35): A solid mid-range option, offering good performance and durability at a reasonable price. Features comfortable grips and a strong cutting blade. Good for a variety of pruning tasks.
Comparison: Fiskars are excellent for casual use and value. Felco is the investment for serious gardeners seeking longevity and top performance. Corona offers a great balance of quality and affordability.
Step 2: Nourishing the Soil Amending and Fertilizing for Winter Health
Just because your plants are going dormant doesn't mean the soil stops working. Fall is an excellent time to amend your soil, replenishing nutrients and improving its structure. This allows the amendments to break down over winter, making nutrients readily available for your plants in spring.
Why Soil Amendments are Crucial for Winter Flower Beds
- Nutrient Replenishment: Plants deplete soil nutrients throughout the growing season. Fall amendments help restore this balance.
- Improved Soil Structure: Organic matter improves drainage in heavy clay soils and water retention in sandy soils.
- Microbial Activity: Adding organic matter feeds beneficial soil microbes, which are essential for nutrient cycling.
- Root Protection: A healthy, well-structured soil provides better insulation for plant roots against freezing temperatures.
How to Amend Your Soil for Winter
The best amendment for almost any garden soil is organic matter. This can include compost, well-rotted manure, or leaf mold. Spread a 2-4 inch layer over your flower beds and gently work it into the top few inches of soil, or simply leave it on top as a protective layer that will slowly break down. Avoid digging too deeply, as this can disturb beneficial soil organisms.
As for fertilizing, a general rule of thumb is to avoid high-nitrogen fertilizers in the fall, as these promote leafy growth that is vulnerable to frost damage. Instead, opt for fertilizers that are higher in phosphorus (P) and potassium (K), which support root development and overall plant health. Bone meal (high in phosphorus) or a balanced slow-release granular fertilizer with a lower first number (e.g., 5-10-10) are good choices. Apply according to package directions.
Product Spotlight: Best Soil Amendments and Fertilizers
- Compost (various brands, typically $5-$15 per bag): The gold standard for soil amendment. Look for 'composted manure' or 'garden compost.' It improves soil structure, adds nutrients, and boosts microbial life. Excellent for all soil types.
- Espoma Organic Bone Meal (around $15-$25 per bag): A natural source of phosphorus and calcium, promoting strong root growth and flowering. Ideal for fall application, especially for bulbs and perennials.
- Jobe's Organics All-Purpose Granular Fertilizer (e.g., 4-4-4 or 2-7-4, around $20-$30): A slow-release organic option that provides balanced nutrition. Look for formulations with lower nitrogen for fall use.
- Leaf Mold (free if you make it!): Decomposed leaves. Excellent for improving soil structure and water retention. Simply rake leaves into a pile and let them decompose for 1-2 years.
Comparison: Compost is the most versatile and beneficial. Bone meal is specific for root development. Jobe's offers a convenient, balanced organic option. Leaf mold is a fantastic, free, long-term soil builder.
Step 3: Mulching for Winter Protection Insulating Your Flower Beds
Mulching is like putting a warm blanket on your flower beds for winter. It's one of the most effective ways to protect your plants from the harsh realities of cold weather. A good layer of mulch insulates the soil, moderating temperature fluctuations and preventing the damaging freeze-thaw cycles that can heave plants out of the ground.
Benefits of Mulching for Winter Flower Beds
- Temperature Moderation: Keeps soil temperatures more consistent, preventing roots from freezing solid or thawing too quickly.
- Moisture Retention: Helps the soil retain moisture, which is still important even in winter, especially for evergreens.
- Weed Suppression: A thick layer of mulch can suppress winter annual weeds and make spring weeding easier.
- Erosion Control: Protects bare soil from wind and water erosion.
- Nutrient Addition: Organic mulches break down over time, adding valuable organic matter and nutrients to the soil.
How to Apply Winter Mulch
Wait until after the first hard frost, when the ground has started to cool but before it freezes solid. Applying mulch too early can trap warmth, encouraging new growth that will be damaged by subsequent cold. Spread a 2-4 inch layer of mulch around your plants, being careful not to pile it directly against the stems or crowns of perennials, as this can lead to rot or pest issues. Leave a small gap, often called a 'mulch collar,' around the base of plants.
Recommended Mulch Types for Winter
- Shredded Hardwood Bark (around $3-$8 per bag): A popular and effective choice. It breaks down slowly, provides good insulation, and looks attractive. Available in various colors.
- Pine Needles (often free if you have pine trees, or $5-$10 per bag): Excellent for acid-loving plants like rhododendrons and azaleas. They interlock, preventing them from blowing away, and provide good insulation.
- Straw (around $5-$10 per bale): A very effective and inexpensive option, especially for vegetable gardens or larger areas. It's lightweight and provides excellent insulation. Make sure it's 'weed-free' straw, not hay, which contains weed seeds.
- Compost (as mentioned in Step 2): A layer of compost can also serve as an excellent winter mulch, providing both insulation and nutrients.
Comparison: Shredded bark is aesthetically pleasing and long-lasting. Pine needles are great for specific plant needs. Straw is highly effective and economical for large areas. Compost offers dual benefits of insulation and soil enrichment.
Step 4: Protecting Vulnerable Plants Providing Extra Winter Care
While general clean-up, soil amendment, and mulching cover most of your flower beds, some plants, especially newly planted ones, tender perennials, or those at the edge of their hardiness zone, might need a little extra TLC to survive winter.
Identifying Vulnerable Plants in Your Flower Beds
- Newly Planted Perennials: Their root systems aren't fully established, making them more susceptible to frost heave.
- Tender Perennials: Plants that are marginally hardy in your climate (e.g., some varieties of lavender, rosemary, or certain hydrangeas in colder zones).
- Evergreens: Broadleaf evergreens can suffer from winter desiccation (drying out) due to cold winds and frozen ground.
- Roses: Especially hybrid teas, often require specific winter protection.
Methods for Extra Winter Protection
- Burlap Wraps: For small shrubs or evergreens, wrapping them loosely in burlap can protect them from harsh winds and sun scald. Ensure there's still some air circulation.
- Rose Cones or Collars: These are specifically designed to protect rose bushes. Fill them with straw or leaves for insulation.
- Anti-Desiccants: For broadleaf evergreens, an anti-desiccant spray can help reduce moisture loss from foliage. Apply on a mild day when temperatures are above freezing.
- Temporary Shelters: For very tender plants, you can create a temporary mini-greenhouse using stakes and clear plastic sheeting, ensuring ventilation on warmer days.
Product Spotlight: Winter Protection Aids
- Burlap Fabric (around $10-$20 for a roll): Versatile for wrapping shrubs, creating windbreaks, or covering tender plants. Look for natural, breathable burlap.
- Rose Cones (around $5-$15 each): Plastic or styrofoam cones designed to cover rose bushes. They provide an insulated dome.
- Wilt-Pruf Anti-Desiccant Spray (around $20-$30 per quart concentrate): A natural, non-toxic spray that forms a clear, protective coating on plant foliage, reducing water loss. Effective for evergreens.
- Garden Stakes and Clear Plastic Sheeting (stakes $1-$3 each, sheeting $10-$20 for a roll): For DIY temporary shelters. Choose UV-resistant plastic.
Comparison: Burlap is a natural, breathable option for general protection. Rose cones are specialized for roses. Wilt-Pruf is excellent for evergreen desiccation. DIY shelters offer custom protection for specific plants.
Watering Your Flower Beds Before Winter
One often-overlooked aspect of winterizing is ensuring your plants are well-hydrated before the ground freezes. This is especially critical for evergreens, as they continue to transpire (lose water through their leaves) throughout the winter, even when the ground is frozen and they can't absorb more water. Give your flower beds a deep, thorough watering just before the first hard freeze. This helps prevent winter desiccation and ensures roots have adequate moisture to draw upon.
Final Thoughts on Winterizing Your Flower Beds
Winterizing your flower beds might seem like a chore, but it's an investment in the future beauty and health of your garden. By following these four essential steps – thorough clean-up, soil nourishment, protective mulching, and targeted care for vulnerable plants – you're not just preparing your garden for winter; you're laying the groundwork for a spectacular display of blooms next spring. Embrace the process, knowing that your efforts now will be richly rewarded when your garden awakens with renewed vitality and color.
:max_bytes(150000):strip_icc()/277019-baked-pork-chops-with-cream-of-mushroom-soup-DDMFS-beauty-4x3-BG-7505-5762b731cf30447d9cbbbbbf387beafa.jpg)


