Growing Microgreens Indoors 5 Easy Steps
Cultivate nutrient-rich microgreens indoors with these 5 easy steps. Enjoy fresh greens year-round.
Cultivate nutrient-rich microgreens indoors with these 5 easy steps. Enjoy fresh greens year-round.
Growing Microgreens Indoors 5 Easy Steps
Why Grow Microgreens The Health and Flavor Benefits
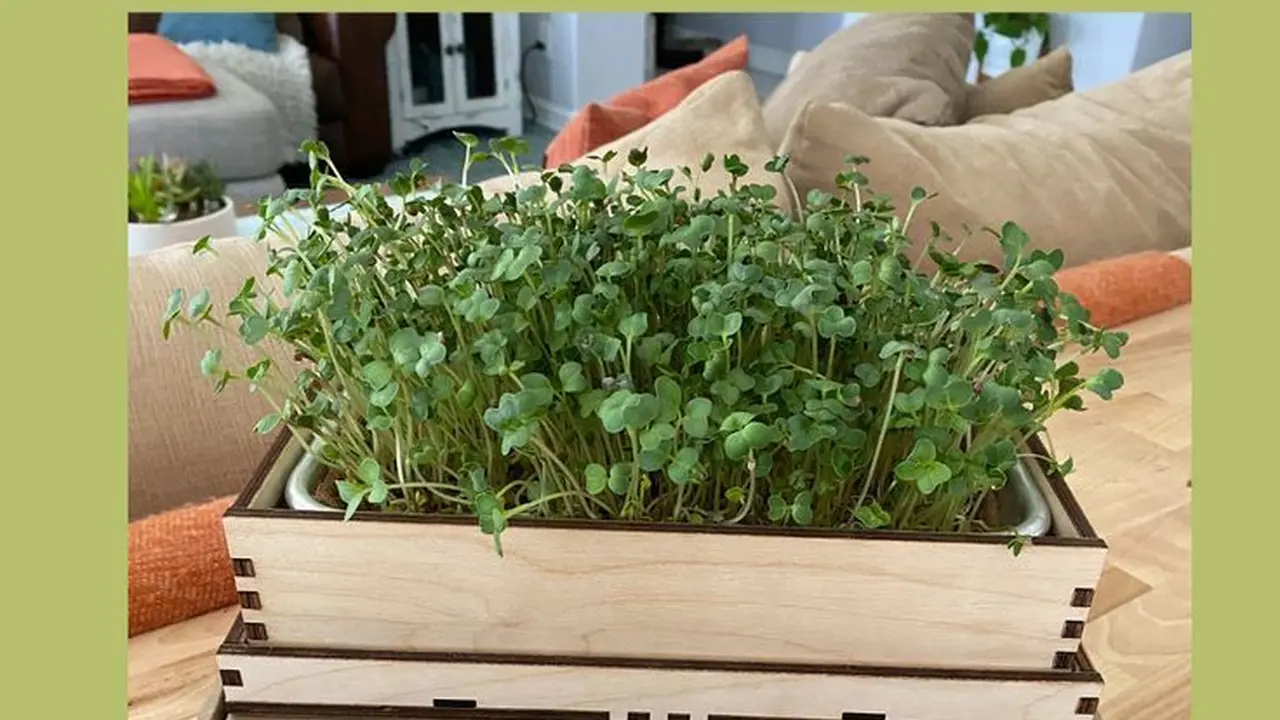
Microgreens are essentially young vegetable greens, harvested just after the first true leaves have developed. They are packed with nutrients, often containing higher concentrations of vitamins, minerals, and antioxidants than their mature counterparts. Think of them as superfoods in miniature! Beyond their impressive nutritional profile, microgreens offer an explosion of flavor, adding a gourmet touch to salads, sandwiches, smoothies, and more. Growing them at home is incredibly rewarding, providing fresh, organic produce right from your windowsill, regardless of the season or your outdoor space.Essential Supplies for Microgreen Cultivation Your Shopping List
Before diving into the planting process, gathering the right supplies is crucial for success. Here's what you'll need:Growing Trays Choosing the Right Size and Type
Growing trays are fundamental. You'll need two types: one with drainage holes for planting and one without for bottom watering and blackout periods. Standard 10x20 inch nursery trays are popular, but smaller trays (like 5x5 inch) are great for beginners or if you have limited space. Look for durable, food-grade plastic trays. Some popular brands include Bootstrap Farmer and True Leaf Market, offering sturdy options that can be reused for many cycles. For a budget-friendly option, you can even repurpose plastic takeout containers or aluminum foil pans, just be sure to add drainage holes to the planting tray.Growing Medium Soil vs Hydroponic Mats
While microgreens can be grown hydroponically on specialized mats, using a good quality potting mix is often easier for beginners. Look for a fine-textured, sterile seed-starting mix that drains well. Avoid heavy garden soil, which can compact and hinder delicate root growth. Brands like FoxFarm Ocean Forest or Espoma Organic Seed Starter are excellent choices. For hydroponic growing, coco coir mats or hemp mats are popular, offering a clean, soil-free alternative. These are great for specific microgreens like radish or broccoli that don't require much nutrient uptake from the medium.Seeds Selecting High-Quality Microgreen Varieties
Not all seeds are created equal for microgreens. You'll need untreated, high-quality seeds specifically intended for microgreen cultivation. Popular choices for beginners include:- Radish: Fast-growing, spicy, and visually appealing. Varieties like 'Sango' or 'China Rose' are excellent.
- Broccoli: Mild flavor, packed with sulforaphane. 'Calabrese' or 'Waltham 29' are good options.
- Arugula: Peppery and quick to mature.
- Kale: Earthy and nutritious. 'Red Russian' or 'Dwarf Blue Curled' work well.
- Mustard: Pungent and fast. 'Garnet Giant' or 'Green Wave' are popular.
- Peas: Sweet and crunchy. 'Sugar Snap' or 'Dun Pea' are great for shoots.
Light Source Natural Sunlight vs Grow Lights
While a sunny windowsill can work, especially for smaller batches, a dedicated grow light will yield much better results, especially during darker months or if you want consistent growth. LED grow lights are energy-efficient and emit less heat. Look for full-spectrum lights. Some popular and affordable options include:- Barrina T5 Grow Lights: These are fluorescent tubes, but the T5 LEDs are very efficient and come in various lengths. A 2-foot, 2-bulb fixture is often sufficient for a couple of 10x20 trays. (Approx. $30-$50)
- Monios-L T8 LED Grow Light: Similar to T5s, these are great for shelving units. (Approx. $40-$60 for a 4-pack)
- Spider Farmer SF-1000: A more powerful, full-spectrum LED grow light, suitable if you plan to scale up or grow other plants. (Approx. $100-$150)
Watering Tools Misters and Spray Bottles
A fine misting bottle is essential for initial watering to avoid disturbing the tiny seeds. Once the microgreens are established, bottom watering (watering from the tray without drainage holes) is preferred to keep the leaves dry and prevent fungal issues. A small watering can with a narrow spout can also be useful.Step-by-Step Guide to Growing Microgreens
Now that you have your supplies, let's get planting!Step 1 Preparing Your Trays and Growing Medium
Take your planting tray (with drainage holes) and fill it with about 1-2 inches of your chosen seed-starting mix. Gently level the soil, but don't compact it too much. You want it to be loose enough for roots to penetrate easily. Lightly mist the surface of the soil until it's evenly moist, but not soggy. This creates a welcoming bed for your seeds.Step 2 Seeding Density and Distribution
This is a critical step for microgreens. Unlike traditional gardening where seeds are spaced out, microgreens require dense seeding. Sprinkle your seeds evenly across the entire surface of the moist soil. Aim for a single layer of seeds, almost touching but not overlapping excessively. For very tiny seeds like broccoli or kale, you might need to sprinkle them from a shaker or use your fingers to distribute them. For larger seeds like peas or sunflowers, you can lay them out more deliberately. Do not cover the seeds with soil, as microgreens are typically surface-sown.Step 3 The Blackout Period Promoting Germination
Once seeded, mist the seeds lightly again. Then, place your second tray (without drainage holes) directly on top of the seeded tray. This creates a 'blackout' period, mimicking the conditions seeds experience underground. It encourages uniform germination and forces the seedlings to stretch, developing stronger stems. You can even place a small weight (like a brick or a book) on top of the upper tray to provide gentle pressure, which further encourages the seedlings to push through the soil. This blackout period typically lasts 2-5 days, depending on the seed type. Check daily for germination.Step 4 Providing Light and Water Post-Germination
As soon as you see the majority of your seeds germinating and the tiny seedlings pushing up, it's time to remove the top tray and expose them to light. Place your trays under your grow light, ensuring the light is 4-6 inches above the seedlings. If using natural light, place them in your sunniest window. Water your microgreens from the bottom by pouring water into the tray without drainage holes. The soil will wick up the water. This prevents damping-off disease and keeps the delicate leaves dry. Water when the top of the soil starts to look dry, usually every 1-2 days.Step 5 Harvesting Your Microgreens When and How
Microgreens are typically ready for harvest in 7-21 days, depending on the variety. They are ready when they have developed their first set of 'true leaves' (the leaves that appear after the initial cotyledons). To harvest, use a sharp pair of scissors or a clean knife. Cut the microgreens just above the soil line, leaving the roots behind. This allows for a clean harvest and prevents soil from getting into your greens. Harvest only what you need, as microgreens are best enjoyed fresh. Once harvested, store any excess in an airtight container in the refrigerator for a few days.Troubleshooting Common Microgreen Problems
Even with the best intentions, you might encounter some issues. Here are common problems and their solutions:Mold and Fungal Growth Prevention and Treatment
Mold is a common issue, especially in humid environments. It often looks like white, fuzzy growth on the soil or stems. To prevent it:- Ensure good air circulation. A small fan can help.
- Avoid overwatering.
- Water from the bottom.
- Don't overcrowd your seeds.
- Use sterile seed-starting mix.
Leggy Microgreens Understanding and Correcting Stretching
Leggy microgreens are tall, thin, and weak, often falling over. This is usually a sign of insufficient light. To correct this:- Move your grow light closer to the trays (4-6 inches).
- Increase the duration of light exposure (12-16 hours per day).
- If using natural light, move trays to a sunnier location.
Poor Germination Causes and Solutions
If your seeds aren't germinating well, consider these factors:- Old or poor-quality seeds: Always use fresh, high-quality microgreen seeds.
- Incorrect temperature: Most microgreens prefer temperatures between 65-75°F (18-24°C).
- Insufficient moisture: Ensure the soil is consistently moist during the blackout period.
- Too much light during germination: The blackout period is crucial.
Beyond the Basics Advanced Microgreen Tips
Once you've mastered the basics, you might want to experiment with more advanced techniques:Succession Planting Continuous Harvests
To ensure a continuous supply of fresh microgreens, practice succession planting. Start a new tray of seeds every few days or once a week. This way, as one tray is harvested, another is ready to take its place.Experimenting with Different Varieties Expanding Your Palette
Don't limit yourself to the beginner-friendly options. Explore other microgreen varieties like cilantro, basil, beet, or even wheatgrass. Each offers unique flavors and textures.Nutrient Solutions for Hydroponic Microgreens
If you venture into hydroponic microgreens, you'll need to introduce a nutrient solution. Look for specialized hydroponic nutrients designed for leafy greens. Brands like General Hydroponics FloraSeries or FoxFarm Grow Big are popular choices. Follow the dilution instructions carefully, as microgreens require less concentrated nutrients than mature plants.Recommended Products for Your Microgreen Journey
Here are some specific product recommendations, including approximate pricing, to help you get started and potentially expand your microgreen setup:Trays and Racks
- Bootstrap Farmer 10x20 Microgreen Trays (with and without holes): Known for their durability and thickness, these trays are a favorite among commercial growers and serious hobbyists. They last for many years. A set of 10 (5 with holes, 5 without) might cost around $40-$60.
- True Leaf Market Microgreen Trays: Similar quality to Bootstrap Farmer, often available in various colors. Prices are comparable.
- VIVOSUN 4-Tier Grow Tent Shelf: If you plan to grow multiple trays, a shelving unit is invaluable. This VIVOSUN unit is sturdy and can accommodate several trays per shelf, perfect for integrating grow lights. (Approx. $70-$100)
Growing Mediums
- FoxFarm Ocean Forest Potting Soil (1.5 cu ft bag): A premium, nutrient-rich soil that works well for microgreens, though it might be a bit 'hot' (high in nutrients) for some delicate varieties. (Approx. $20-$30)
- Espoma Organic Seed Starting Mix (16 qt bag): A lighter, finer mix specifically designed for seed germination, ideal for microgreens. (Approx. $15-$25)
- Hydrofarm Grodan Rockwool Cubes (1.5 inch): For hydroponic setups, these sterile cubes provide excellent aeration and moisture retention. (Approx. $10-$15 for a pack of 50)
- Hemp Grow Mats (10x20 inch, 10-pack): A sustainable and easy-to-use hydroponic medium. (Approx. $20-$30)
Seeds
- True Leaf Market Microgreen Seed Kits: They offer various kits with popular microgreen seeds, often in bulk sizes, which are more economical than small packets. A beginner kit might be $20-$40.
- Johnny's Selected Seeds (various varieties): Known for their high-quality, untreated seeds. Prices vary widely depending on the seed type and quantity, but expect to pay $5-$15 for a small packet of microgreen seeds.
Lighting
- GE Grow Light LED Bulb (BR30 or PAR38): If you're just starting with one or two small trays, a single full-spectrum LED bulb in a standard lamp fixture can work. (Approx. $15-$25 per bulb)
- Spider Farmer SF-600 LED Grow Light: A compact, full-spectrum LED light that's great for a couple of 10x20 trays. It's energy-efficient and has a good lifespan. (Approx. $70-$90)
- VIVOSUN VS1000 LED Grow Light: A more powerful option for larger setups or if you want to grow other plants. (Approx. $120-$150)
Watering and Accessories
- Dramm 17001 One Touch Rain Wand: While a bit pricier, this watering wand provides a gentle shower, perfect for bottom watering larger trays without disturbing seedlings. (Approx. $25-$35)
- Generic Fine Mist Spray Bottle (2-pack): Essential for initial seed moistening. (Approx. $5-$10)
- Fiskars Micro-Tip Pruning Snips: Ideal for precise harvesting of microgreens. (Approx. $10-$15)
:max_bytes(150000):strip_icc()/277019-baked-pork-chops-with-cream-of-mushroom-soup-DDMFS-beauty-4x3-BG-7505-5762b731cf30447d9cbbbbbf387beafa.jpg)