\n\n
Why Grow Dahlias The Allure of These Magnificent Flowers
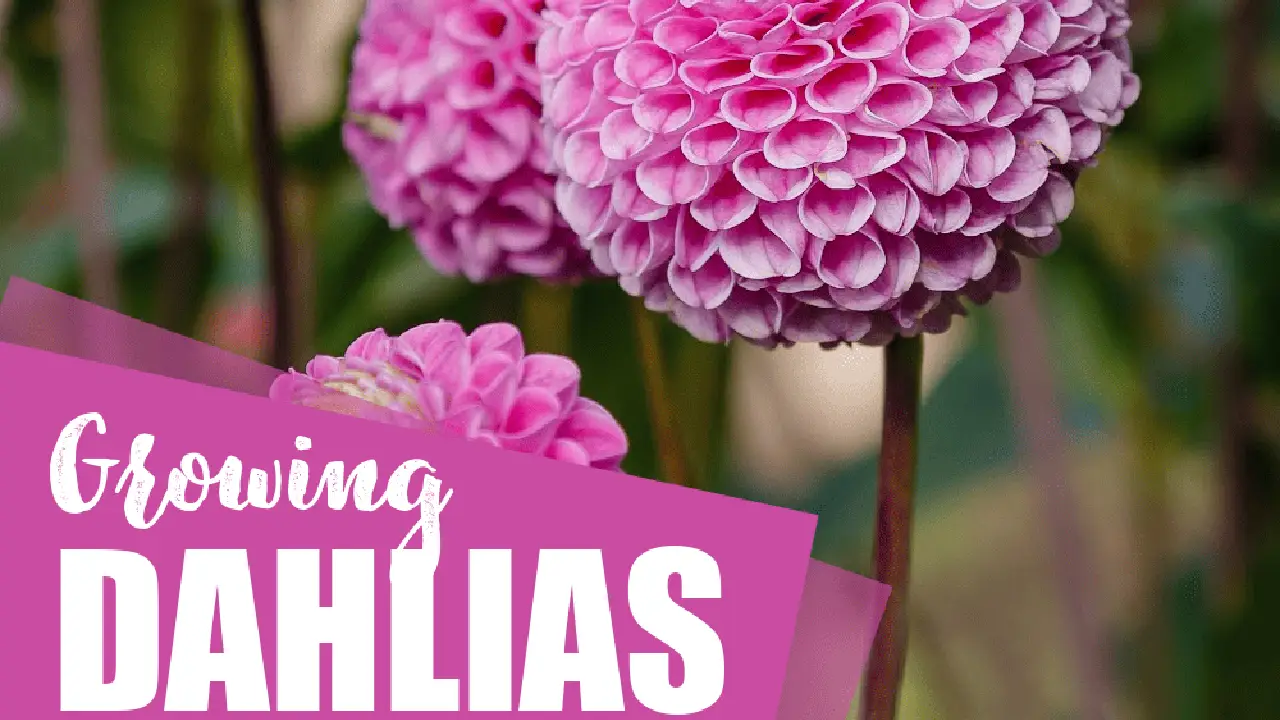
\n\nDahlias are truly one of the most captivating flowers you can add to your garden. Their incredible diversity in size, shape, and color makes them a favorite among gardeners, from novices to seasoned pros. From tiny pompons to dinner-plate giants, dahlias offer a spectacular display that can last from mid-summer until the first frost. They are perfect for adding a dramatic flair to your garden beds, creating stunning cut flower arrangements, or simply enjoying their vibrant beauty. Unlike many other popular garden flowers, dahlias offer an almost endless array of forms – from the spiky cactus types to the perfectly symmetrical decorative and ball varieties. This versatility means there's a dahlia out there for every garden style and personal preference. Plus, their long blooming season ensures a continuous burst of color when many other plants are starting to fade.\n\n
Choosing Your Dahlia Tubers Selecting the Best Varieties for Your Garden
\n\nSelecting the right dahlia tubers is the first exciting step in your dahlia growing journey. With thousands of varieties available, it can feel overwhelming, but focusing on a few key aspects will help you make the best choices. Consider the mature size of the plant, the bloom size, and the color palette you desire for your garden. For beginners, it's often wise to start with varieties known for their vigor and ease of growth. Look for healthy, firm tubers with at least one visible 'eye' or growth point. Avoid any that are soft, shriveled, or moldy.\n\n
Popular Dahlia Varieties for Beginners
\n\n
\n - 'Café au Lait': A classic dinnerplate dahlia, famous for its soft, muted tones of blush, cream, and peach. It's a favorite for cut flower arrangements and wedding bouquets. While large, it's surprisingly forgiving for beginners.
\n - 'Karma Prospero': A beautiful decorative dahlia with deep purple-red blooms. Known for its strong stems and excellent vase life, making it ideal for cutting.
\n - 'Thomas Edison': Another large decorative dahlia, boasting rich, deep purple flowers. It's a robust grower and a real showstopper in the garden.
\n - 'Bishop of Llandaff': A striking single-flowered dahlia with vibrant scarlet blooms and dark bronze foliage. It's a smaller plant, perfect for borders or containers, and attracts pollinators.
\n - 'Cornel': A perfect ball dahlia with deep red, perfectly spherical blooms. Excellent for cutting and very prolific.
\n - 'Mystic Spirit': Part of the 'Mystic' series, known for their dark foliage and vibrant, single or semi-double flowers. 'Mystic Spirit' has bright orange blooms and is very easy to grow.
\n
\n\n
Where to Buy Dahlia Tubers Reputable Sources and Online Retailers
\n\nWhen purchasing dahlia tubers, quality matters. Buying from reputable sources ensures you get healthy, true-to-name varieties. Here are some highly recommended options:\n\n
\n - Swan Island Dahlias (USA): One of the largest dahlia growers in the US, offering an immense selection. Their tubers are consistently high quality.
\n - Dahlias.com (USA): Another excellent US-based supplier with a wide range of varieties and good customer service.
\n - Connell's Dahlias (USA): Known for their unique and hard-to-find varieties, often selling out quickly.
\n - Eden Brothers (USA): Offers a good selection of popular dahlia varieties, often with competitive pricing.
\n - Breck's (USA/Canada): A well-known bulb and perennial supplier with a decent selection of dahlias.
\n - Sarah Raven (UK): For gardeners in the UK and Europe, Sarah Raven offers a curated selection of beautiful dahlia varieties.
\n - Farmer Gracy (Europe): Another excellent European option for high-quality bulbs and tubers.
\n - Local Nurseries and Garden Centers: Many local nurseries will carry a selection of dahlia tubers in spring. This allows you to inspect the tubers in person.
\n - Online Marketplaces (e.g., Etsy, specialized dahlia groups on Facebook): While you can find unique varieties here, exercise caution and check seller reviews. Some smaller growers offer excellent quality, but consistency can vary.
\n
\n\nPrices for dahlia tubers can vary significantly based on the variety's rarity, size, and demand. Common varieties might range from $5-$10 per tuber, while highly sought-after or new introductions can cost $20 or more. Some online retailers offer collections or bulk discounts, which can be a good value for beginners.\n\n
Planting Dahlias Step-by-Step Guide for Success
\n\nTiming and location are crucial for successful dahlia growth. Dahlias are tender perennials, meaning they cannot tolerate frost. They thrive in full sun and well-draining soil.\n\n
When to Plant Dahlias Timing is Everything
\n\nPlant dahlia tubers after all danger of frost has passed in your area, typically in late spring or early summer when the soil has warmed up to at least 60°F (15°C). In most regions, this is around Mother's Day or Memorial Day. If you live in a colder climate, you can start tubers indoors in pots 4-6 weeks before your last frost date to get a head start.\n\n
Where to Plant Dahlias Sunlight and Soil Requirements
\n\nChoose a location that receives at least 6-8 hours of direct sunlight per day. Dahlias are sun-lovers, and insufficient light will result in leggy plants and fewer blooms. The soil should be well-draining and rich in organic matter. If you have heavy clay soil, amend it generously with compost, aged manure, or other organic materials to improve drainage and fertility. A slightly acidic to neutral pH (6.5-7.0) is ideal.\n\n
How to Plant Dahlia Tubers A Simple Process
\n\n1.
Prepare the Hole: Dig a hole about 6-8 inches deep and wide enough to accommodate the tuber. If planting multiple dahlias, space them 18-36 inches apart, depending on the mature size of the variety. Larger varieties need more space.\n2.
Place the Tuber: Lay the dahlia tuber horizontally in the hole with the 'eye' or sprout facing upwards. If there's a visible stem from last year, position it so it's pointing up.\n3.
Add Support (Optional but Recommended): For taller varieties, it's best to install a stake at planting time. This prevents damage to the tuber later when staking the growing plant. A sturdy bamboo stake or metal rebar works well.\n4.
Cover with Soil: Cover the tuber with about 2-3 inches of soil. Do not water immediately after planting, especially in cooler climates, as this can lead to rot. The tuber has enough moisture stored within it.\n5.
Initial Watering (After Sprouting): Once you see sprouts emerging from the soil (which can take 2-4 weeks), you can begin watering regularly.\n\n
Caring for Dahlias From Sprout to Bloom
\n\nConsistent care is key to abundant dahlia blooms. While they are relatively low-maintenance once established, a few practices will ensure their success.\n\n
Watering Dahlias The Right Amount for Healthy Growth
\n\nOnce your dahlias have sprouted, they need consistent moisture, especially during dry periods. Aim for deep watering 2-3 times a week, ensuring the water penetrates the root zone. Avoid overhead watering, which can encourage fungal diseases. Drip irrigation or soaker hoses are excellent choices. Reduce watering as the season cools down and before digging up tubers for winter storage.\n\n
Fertilizing Dahlias Nourishing Your Plants
\n\nDahlias are heavy feeders. Once the plants are about a foot tall, begin fertilizing with a low-nitrogen fertilizer (e.g., 5-10-10 or 10-20-20) every 3-4 weeks. Too much nitrogen will promote lush foliage at the expense of flowers. Switch to a bloom-boosting fertilizer (higher in phosphorus and potassium) once buds start to form. Always follow the product's instructions for application rates.\n\n
Staking Dahlias Providing Essential Support
\n\nMost dahlia varieties, especially the taller ones, will require staking to prevent their heavy blooms from snapping stems in wind or rain. If you didn't stake at planting, do so when the plants are about 1-2 feet tall. Use sturdy stakes and tie the stems loosely to them as they grow. Tomato cages can also work for bushier varieties.\n\n
Pinching and Deadheading Maximizing Blooms
\n\n*
Pinching: When your dahlia plant has developed 3-4 sets of leaves, pinch out the central growing tip. This encourages the plant to branch out, resulting in a bushier plant with more flowers. While it delays the first bloom slightly, it significantly increases the overall flower production.\n*
Deadheading: Regularly remove spent blooms (deadhead) by cutting the stem back to a strong leaf node or side shoot. This signals the plant to produce more flowers instead of putting energy into seed production. The more you cut, the more they bloom!\n\n
Pest and Disease Management Common Issues and Solutions
\n\nDahlias are generally robust, but they can encounter some common garden pests and diseases.\n\n*
Slugs and Snails: These can be a problem for young sprouts. Use organic slug baits, beer traps, or hand-pick them in the early morning or evening.\n*
Aphids: Small, soft-bodied insects that cluster on new growth. Spray with a strong jet of water or use insecticidal soap.\n*
Earwigs: Can chew on petals. Traps (like rolled-up newspapers) or insecticidal soap can help.\n*
Powdery Mildew: A white, powdery coating on leaves, especially in humid conditions. Ensure good air circulation, avoid overhead watering, and use a fungicide if severe.\n*
Botrytis Blight (Gray Mold): Appears as fuzzy gray mold on flowers and leaves, particularly in wet conditions. Remove affected parts and improve air circulation.\n*
Dahlia Mosaic Virus: Causes yellowing, stunted growth, and distorted leaves. There is no cure; infected plants should be removed and destroyed to prevent spread.\n\n
Overwintering Dahlias Storing Tubers for Next Season
\n\nIn most climates outside of USDA Zones 8-11, dahlia tubers need to be dug up and stored indoors for the winter. This process ensures you can enjoy your favorite varieties year after year.\n\n
When to Dig Up Dahlia Tubers Timing for Winter Storage
\n\nWait until after the first hard frost has blackened the foliage. This allows the plant to send energy back down to the tubers, preparing them for dormancy. Typically, this is in late fall.\n\n
How to Dig and Store Dahlia Tubers A Step-by-Step Guide
\n\n1.
Cut Back Stems: Cut the dahlia stems back to about 4-6 inches above the ground.\n2.
Carefully Dig: Using a garden fork, carefully dig around the plant, starting about a foot away from the stem to avoid damaging the tubers. Gently lift the entire clump from the soil.\n3.
Clean Tubers: Gently shake off excess soil. You can rinse them with a hose, but ensure they are thoroughly dried before storage. Some growers prefer not to wash them.\n4.
Cure Tubers: Place the tubers in a cool, dry, well-ventilated area (like a garage or basement) for a few days to a week to allow the skin to toughen up. This 'curing' process helps prevent rot during storage.\n5.
Divide (Optional): You can divide your dahlia clumps in the fall or wait until spring. Each division must have at least one 'eye' and a piece of the original stem. Use a sharp, clean knife to make cuts.\n6.
Store Tubers: Store the cured tubers in a cool (40-50°F or 4-10°C), dark, and slightly humid place. Good storage mediums include peat moss, vermiculite, wood shavings, or even newspaper. Place tubers in cardboard boxes, plastic bins with ventilation holes, or paper bags. Ensure they are not touching each other if possible, or layer them with your chosen medium. Label each tuber or clump with its variety name.\n7.
Check Periodically: Check your stored tubers monthly for any signs of rot or shriveling. If they look too dry, mist them lightly. If you see rot, cut it out and ensure the area is dry.\n\n
Recommended Products for Dahlia Growing
\n\nHaving the right tools and products can make your dahlia growing experience much smoother and more successful. Here are some recommendations, including specific product types and considerations for different budgets.\n\n
Gardening Tools Essential for Dahlia Care
\n\n*
Garden Fork: Essential for digging up tubers without damaging them. Look for sturdy, stainless steel options.
*
Product Example: Fiskars Ergo D-Handle Steel Garden Fork (around $40-60). Durable and comfortable.
*
Budget Option: Any basic steel garden fork from a local hardware store (around $20-30).
*
Bypass Pruners: For pinching, deadheading, and cutting back stems. A sharp, clean cut is crucial.
*
Product Example: Felco F-2 Classic Pruner (around $70-90). A professional-grade, long-lasting choice.
*
Budget Option: Fiskars Bypass Pruning Shears (around $15-25). Good for general use.
*
Garden Gloves: Protect your hands from soil and potential irritants.
*
Product Example: Atlas Nitrile Touch Gloves (around $5-10 per pair). Excellent dexterity and protection.
*
Budget Option: Any comfortable, durable gardening gloves from a discount store.
*
Stakes: Crucial for supporting tall dahlia plants.
*
Product Example: Heavy-duty bamboo stakes (6-8 feet, around $2-5 each) or metal rebar (around $10-15 for a long piece).
*
Budget Option: Repurposed sturdy sticks or branches from your yard.
*
Plant Ties: Soft ties that won't damage stems.
*
Product Example: Velcro Plant Ties (around $10-15 for a roll). Reusable and gentle.
*
Budget Option: Strips of old t-shirts or soft twine.
Soil Amendments and Fertilizers Enhancing Growth and Blooms
\n\n*
Compost/Aged Manure: Improves soil structure, drainage, and fertility.
*
Product Example: Local garden center bagged compost (around $5-10 per bag) or bulk from a landscape supply.
*
Budget Option: Start your own compost pile!
*
Low-Nitrogen Fertilizer (e.g., 5-10-10): For initial growth.
*
Product Example: Espoma Flower-tone (3-4-5) or Jobe's Organics Bone Meal (3-15-0) (around $15-25 for a bag).
*
Budget Option: Generic granular fertilizer from a hardware store, just check the NPK ratio.
*
Bloom-Boosting Fertilizer (higher P and K): For flowering.
*
Product Example: FoxFarm Big Bloom Liquid Plant Food (0-5-4) or Alaska Fish Fertilizer (5-1-1, but good for overall health) (around $20-30).
*
Budget Option: Homemade compost tea.
Pest and Disease Control Organic and Safe Options
\n\n*
Insecticidal Soap: For aphids and other soft-bodied pests.
*
Product Example: Safer Brand Insect Killing Soap (around $10-15).
*
Budget Option: Make your own with mild dish soap and water (test on a small area first).
*
Slug and Snail Bait: Iron phosphate-based baits are safe for pets and wildlife.
*
Product Example: Sluggo Plus (around $15-25).
*
Budget Option: Beer traps or hand-picking.
*
Neem Oil: A broad-spectrum organic pesticide and fungicide.
*
Product Example: Garden Safe Brand Fungicide3 (contains neem oil) (around $10-15).
*
Budget Option: Pure neem oil concentrate (mix yourself).
Storage Solutions for Tubers Keeping Them Healthy Over Winter
\n\n*
Storage Medium: Peat moss, vermiculite, or wood shavings.
*
Product Example: Large bags of peat moss or vermiculite (around $15-30).
*
Budget Option: Shredded newspaper or sawdust (ensure it's not from treated wood).
*
Storage Containers: Cardboard boxes, plastic bins with ventilation, or paper bags.
*
Product Example: Sterilite 18 Gallon Tote with lid (drill holes for ventilation) (around $10-15).
*
Budget Option: Free cardboard boxes from grocery stores.
Troubleshooting Common Dahlia Problems
\n\nEven with the best care, you might encounter a few hiccups. Here's how to address them.\n\n
Dahlias Not Blooming Lack of Flowers
\n\n*
Insufficient Sunlight: Dahlias need at least 6-8 hours of direct sun. Move them if they're in too much shade.\n*
Too Much Nitrogen: If you have lush green foliage but no flowers, your fertilizer might be too high in nitrogen. Switch to a fertilizer with higher phosphorus and potassium.\n*
Lack of Water: Stress from drought can inhibit blooming. Ensure consistent, deep watering.\n*
Pest Damage: Severe pest infestations can weaken the plant and reduce blooms. Address any pest issues promptly.\n*
Late Pinching: If you pinched too late in the season, it might delay blooms. Be patient, they will come.\n\n
Leggy Dahlia Plants Stretched Growth
\n\n*
Insufficient Light: The most common cause. Plants stretch to reach for light. Ensure full sun exposure.\n*
Too Much Nitrogen: Again, excess nitrogen can lead to leggy, leafy growth. Adjust your fertilizer.\n*
Lack of Pinching: Pinching encourages bushier growth. If you didn't pinch, the plant might grow tall and spindly.\n\n
Yellowing Leaves Discoloration Issues
\n\n*
Overwatering/Poor Drainage: The most frequent cause. Roots can't breathe, leading to nutrient uptake issues. Ensure well-draining soil and don't overwater.\n*
Underwatering: While less common for yellowing, severe drought stress can cause leaves to yellow and crisp.\n*
Nutrient Deficiency: Iron deficiency (interveinal chlorosis, yellowing between green veins) or nitrogen deficiency (overall pale yellowing of older leaves) can occur. A balanced fertilizer or specific micronutrient supplement can help.\n*
Pests or Diseases: Some pests (like spider mites) or diseases (like Dahlia Mosaic Virus) can cause yellowing. Inspect your plants closely.\n\n
Rotting Tubers Storage Problems
\n\n*
Insufficient Curing: Tubers need to dry out sufficiently before storage to prevent mold and rot.\n*
Too Much Moisture During Storage: High humidity or condensation in storage containers can lead to rot. Ensure good ventilation and use a dry storage medium.\n*
Temperatures Too High: Warm storage temperatures can encourage premature sprouting or rot. Keep storage cool (40-50°F).\n*
Damaged Tubers: Tubers that were bruised or cut during digging are more susceptible to rot. Handle them carefully.\n\n
Enjoying Your Dahlias From Garden to Vase
\n\nOne of the greatest joys of growing dahlias is their incredible versatility as cut flowers. They make stunning bouquets and last a long time in a vase if harvested correctly.\n\n
Harvesting Dahlias for Cut Flowers Tips for Longevity
\n\n*
Timing: Cut dahlias in the early morning or late evening when the plant is fully hydrated.
*
Maturity: Harvest blooms when they are fully open but still firm. Buds will generally not open once cut.
*
Cutting Technique: Use sharp, clean pruners. Cut long stems, leaving at least two sets of leaves on the plant to encourage more blooms.
*
Immediate Hydration: Plunge the cut stems immediately into a bucket of cool water.
*
Conditioning: Allow the cut flowers to condition in a cool, dark place for a few hours (or overnight) before arranging. This helps them take up water and prolongs vase life.
*
Remove Lower Foliage: Strip any leaves that would fall below the waterline in your vase to prevent bacterial growth.
*
Change Water Regularly: Change the water in your vase every day or two and re-cut the stems for maximum freshness.
Dahlias in the Landscape Design Ideas and Combinations
\n\nDahlias are incredibly versatile and can be incorporated into various garden designs. Their bold colors and forms make them excellent focal points.\n\n
Creating a Dahlia Border
\n\nPlant dahlias in groups of three or five for a more impactful display. Mix different sizes and forms for visual interest. Place taller varieties at the back of the border and shorter ones towards the front.\n\n
Dahlias in Containers
\n\nMany smaller dahlia varieties (like 'Topmix' or 'Mignon' types) thrive in containers. Ensure the container is large enough (at least 12-15 inches in diameter) and has good drainage. Use a high-quality potting mix.\n\n
Companion Planting with Dahlias
\n\nPair dahlias with plants that have similar light and water requirements. Good companions include:\n\n*
Grasses: Ornamental grasses provide a lovely textural contrast.\n*
Salvias: Their spiky blooms and long flowering season complement dahlias well.\n*
Cosmos and Zinnias: These annuals offer continuous color and are also great for cutting.\n*
Cannas and Elephant Ears: For a tropical, bold look.\n*
Foliage Plants: Plants with interesting foliage, like coleus or sweet potato vine, can highlight dahlia blooms.\n\n
Advanced Dahlia Growing Techniques for Enthusiasts
\n\nOnce you've mastered the basics, you might want to explore more advanced techniques to get even more from your dahlias.\n\n
Dividing Dahlia Tubers Expanding Your Collection
\n\nDividing tubers is how you propagate dahlias and increase your stock. It's best done in spring before planting, as the 'eyes' are more visible. Each division must have at least one eye and a piece of the original stem (the 'neck').\n\n
Starting Dahlias from Seed A Fun Experiment
\n\nWhile most dahlias are grown from tubers, you can also grow them from seed. Seed-grown dahlias will not be true to the parent plant (unless it's an open-pollinated variety) but can produce exciting new variations. It's a fun way to discover unique blooms.\n\n
Exhibiting Dahlias Growing for Show
\n\nFor those interested in competitive growing, specific techniques are used to produce perfect show-quality blooms, including disbudding (removing side buds to encourage a single, larger bloom) and precise feeding schedules. Joining a local dahlia society can provide invaluable knowledge and support for this endeavor.\n\nGrowing dahlias is a rewarding experience that brings immense beauty and joy to any garden. With a little care and attention, you can enjoy their spectacular blooms for many seasons to come."
}
]
}
:max_bytes(150000):strip_icc()/277019-baked-pork-chops-with-cream-of-mushroom-soup-DDMFS-beauty-4x3-BG-7505-5762b731cf30447d9cbbbbbf387beafa.jpg)