Learn 3 simple methods to propagate flowers from cuttings. Expand your garden for free.
Learn 3 simple methods to propagate flowers from cuttings. Expand your garden for free.
Propagating Flowers from Cuttings 3 Easy Methods
Why Propagate Flowers from Cuttings Benefits and Basics
Have you ever looked at a beautiful flower in your garden and wished you had more of them? Or perhaps you saw a stunning plant at a friend's house and thought, 'I'd love to have that!' Well, good news! You don't always have to buy new plants. Propagating flowers from cuttings is a fantastic way to expand your garden for free, share plants with friends, and even save money. It's also incredibly rewarding to watch a tiny cutting grow into a thriving plant.
So, what exactly is propagation from cuttings? It's essentially taking a piece of an existing plant – usually a stem, but sometimes a leaf or root – and encouraging it to grow new roots and become a whole new plant. It's like cloning your favorite plants! This method is particularly effective for many popular flowering plants, and it allows the new plant to be genetically identical to the 'mother' plant, meaning it will have the same flower color, size, and growth habits.
There are several benefits to propagating from cuttings:
* **Cost-Effective:** It's free! All you need is an existing plant and some basic supplies.
* **Genetic Duplication:** The new plant will be exactly like the parent plant, which isn't always guaranteed with seeds.
* **Faster Growth:** Cuttings often establish faster than plants grown from seed, as they already have some mature plant tissue.
* **Preserving Varieties:** If you have a unique or heirloom variety, cuttings are a great way to ensure its continuation.
* **Sharing with Friends:** It's a wonderful way to share your garden's beauty with others.
Before we dive into the methods, let's talk about some general tips that apply to all types of cutting propagation:
* **Timing is Key:** The best time to take cuttings often depends on the plant, but generally, spring and early summer are ideal when plants are actively growing.
* **Healthy Parent Plant:** Always take cuttings from a healthy, disease-free plant. This increases your chances of success.
* **Clean Tools:** Use sharp, clean pruning shears or a knife to make clean cuts. This prevents crushing the stem and reduces the risk of disease.
* **Remove Lower Leaves:** Always remove any leaves that would be submerged in water or buried in the rooting medium. These can rot and cause problems.
* **Humidity:** Many cuttings benefit from high humidity, especially in the initial rooting phase. A clear plastic bag or a humidity dome can help.
* **Patience:** Rooting takes time! Don't get discouraged if you don't see roots immediately. Some plants root faster than others.
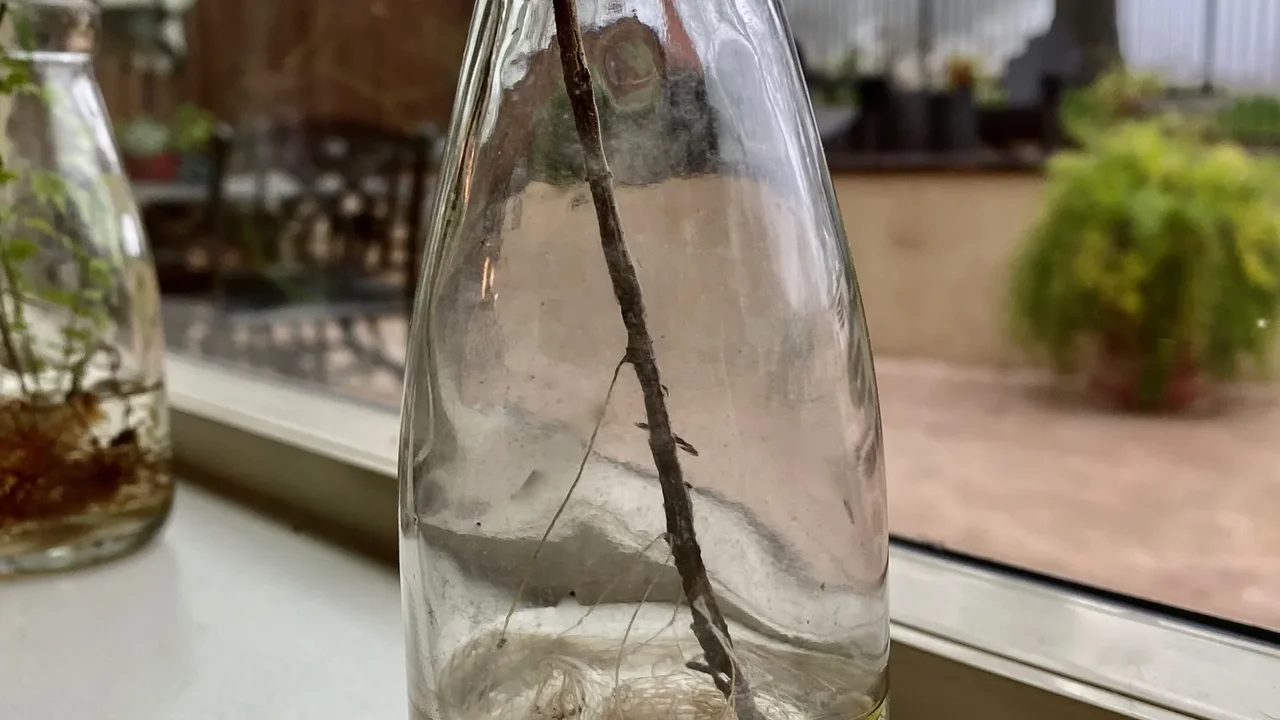
Method 1 Water Propagation Simple and Effective for Many Flowers
Water propagation is arguably the easiest and most visually satisfying method for beginners. You get to watch the roots develop right before your eyes! It's particularly effective for plants that readily root in water, such as Pothos (though not a flower, it's a great example), Coleus, Impatiens, and many types of herbs. For flowering plants, some varieties of Geraniums, Begonias, and even certain types of Roses can be successfully rooted in water.
Step-by-Step Water Propagation Guide
1. **Select Your Cutting:** Choose a healthy, non-flowering stem from your parent plant. Look for a stem that's about 4-6 inches long with at least 2-3 nodes (the bumps on the stem where leaves or branches emerge). Avoid stems with flowers or buds, as the plant will put energy into blooming rather than rooting.
2. **Make the Cut:** Using your clean, sharp shears, make a clean cut just below a node. This node is where new roots are most likely to form.
3. **Prepare the Cutting:** Remove any leaves from the bottom 2-3 inches of the stem. These leaves would rot if submerged in water, which can lead to bacterial growth and inhibit rooting.
4. **Place in Water:** Fill a clean glass or jar with room-temperature water. Distilled or filtered water is often preferred, but tap water that has sat out for 24 hours (to allow chlorine to dissipate) can also work. Place your cutting in the water, ensuring that at least one node is submerged.
5. **Location, Location, Location:** Place the jar in a bright spot with indirect sunlight. Avoid direct, harsh sunlight, which can overheat the water and stress the cutting.
6. **Change Water Regularly:** Change the water every few days, or at least once a week, to keep it fresh and prevent algae or bacterial growth. This is crucial for success.
7. **Wait for Roots:** Be patient! Roots can appear anywhere from a few days to several weeks, depending on the plant. Once the roots are about 1-2 inches long, your cutting is ready for planting.
Recommended Products for Water Propagation
While water propagation is simple and doesn't require many specialized tools, a few items can make the process smoother and more successful.
* **Clear Glass Jars/Vases:** Any clean glass jar will do, but having a variety of sizes can be helpful. For instance, a narrow-necked vase can help support the cutting upright. You can find sets of small propagation vases on Amazon for around $15-$30. Look for brands like 'Mkono' or 'TERESA's COLLECTIONS' which offer aesthetically pleasing and functional options.
* **Rooting Hormone (Optional but Recommended):** While not strictly necessary for all water-rooting plants, a liquid rooting hormone can significantly speed up root development and increase success rates. You simply dip the cut end of the stem into the hormone before placing it in water.
* **Clonex Rooting Gel:** This is a popular choice among professional propagators and hobbyists alike. It's a gel formulation that adheres well to the cutting. A 100ml bottle typically costs around $15-$25. It's known for its effectiveness across a wide range of plants.
* **Garden Safe TakeRoot Rooting Hormone:** A more budget-friendly powder option, often found at local garden centers or online for $5-$10. You'd dip the wet cutting into the powder before placing it in water. While primarily for soil, it can be used for water propagation by ensuring good adherence.
* **Pruning Shears:** A good pair of sharp, clean pruning shears is essential for making clean cuts.
* **Fiskars Bypass Pruning Shears:** A reliable and affordable option, usually around $15-$25. They are durable and easy to clean.
* **Felco F-2 Classic Manual Hand Pruner:** A more premium choice, often costing $60-$80, but known for its exceptional sharpness, durability, and ergonomic design. If you plan on doing a lot of gardening, this is a worthwhile investment.
Pros and Cons of Water Propagation
**Pros:**
* **Simplicity:** Very easy for beginners.
* **Visibility:** You can see the roots growing, which is exciting and helps you know when to plant.
* **Cleanliness:** Less messy than soil propagation.
**Cons:**
* **Transplant Shock:** Cuttings rooted in water can sometimes experience 'transplant shock' when moved to soil, as the roots developed in water are different from those that grow in soil. This can be mitigated by gradually introducing them to soil or by using a very light, well-draining potting mix initially.
* **Not for All Plants:** Some plants simply don't root well in water.
* **Nutrient Deficiency:** Water provides no nutrients, so cuttings rely on stored energy until roots form.
Method 2 Soil Propagation Reliable and Versatile for Many Flowers
Soil propagation is a widely used and highly reliable method for rooting a vast array of flowering plants. It mimics the natural environment where plants grow, often leading to stronger, more robust root systems that are better adapted to soil conditions from the start. This method is excellent for plants like Hydrangeas, Roses, Lavender, and many perennials.
Step-by-Step Soil Propagation Guide
1. **Prepare Your Potting Mix:** The right rooting medium is crucial. You want something light, well-draining, and sterile to prevent diseases. A good mix is usually a combination of peat moss or coco coir, perlite, and/or vermiculite. Avoid heavy garden soil, as it can compact and lead to rot.
2. **Select Your Cutting:** As with water propagation, choose a healthy, non-flowering stem about 4-6 inches long. For woody plants like roses, select a stem that's semi-hardwood (not too new and soft, not too old and woody). Make a clean cut just below a node.
3. **Prepare the Cutting:** Remove the lower leaves, leaving only 2-4 leaves at the top. If the remaining leaves are very large, you can cut them in half horizontally to reduce moisture loss.
4. **Apply Rooting Hormone (Highly Recommended):** Dip the cut end of the stem into rooting hormone powder or gel. Tap off any excess. This step significantly increases the chances of success by stimulating root growth and protecting against fungal diseases.
5. **Plant the Cutting:** Make a small hole in your prepared potting mix with a pencil or a stick. Insert the cutting into the hole, ensuring that at least one node (preferably 2-3) is buried in the mix. Gently firm the soil around the cutting to ensure good contact.
6. **Water Thoroughly:** Water the potting mix thoroughly until water drains from the bottom of the pot. This settles the mix around the cutting.
7. **Create a Humid Environment:** This is a critical step for soil propagation. Place a clear plastic bag over the pot, or use a humidity dome, to create a mini-greenhouse effect. This high humidity prevents the cutting from drying out while it's trying to form roots. Ensure the plastic doesn't touch the leaves too much.
8. **Provide Indirect Light:** Place the potted cutting in a warm spot with bright, indirect light. Avoid direct sunlight, which can scorch the cutting or overheat the mini-greenhouse.
9. **Monitor and Maintain:** Check the moisture level of the potting mix regularly. It should remain consistently moist but not soggy. Mist the leaves occasionally if you're not using a sealed humidity dome. Open the plastic bag for a few minutes each day to allow for air circulation and prevent fungal issues.
10. **Test for Roots:** After several weeks (the time varies greatly by plant), gently tug on the cutting. If you feel resistance, it means roots have formed. You might also see new leaf growth. Once well-rooted, you can gradually acclimate the plant to lower humidity before transplanting.
Recommended Products for Soil Propagation
Successful soil propagation relies on a few key products that provide the right environment for root development.
* **Seed Starting Mix or Perlite/Vermiculite:** These are ideal for rooting cuttings because they are sterile, lightweight, and provide excellent drainage and aeration.
* **Jiffy Seed Starting Mix:** A popular choice, often available in 16-quart bags for $10-$15. It's finely textured and holds moisture well.
* **Hoffman Horticultural Perlite:** A 4-quart bag costs around $8-$12. Perlite improves drainage and aeration. You can mix it with peat moss or coco coir.
* **Espoma Organic Vermiculite:** Similar to perlite, vermiculite retains moisture and nutrients. A 8-quart bag is typically $10-$15.
* **Rooting Hormone (Powder or Gel):** Essential for most soil cuttings to stimulate root growth.
* **Garden Safe TakeRoot Rooting Hormone:** As mentioned before, this powder is very effective for soil propagation. Around $5-$10 for a small container.
* **Clonex Rooting Gel:** Also excellent for soil cuttings, providing good adherence and consistent results. $15-$25 for 100ml.
* **Small Pots or Trays:** Use pots with drainage holes. 2-4 inch pots are usually sufficient for individual cuttings.
* **Viagrow 2-inch Square Nursery Pots:** A pack of 100 can be found for $15-$25. They are reusable and durable.
* **Seed Starting Trays with Domes:** These kits often come with small cells and a clear plastic dome, perfect for creating a humid environment for multiple cuttings. A 10-pack kit with domes might cost $20-$40. Brands like 'Bonviee' or 'Gardener's Supply Company' offer good options.
* **Misting Bottle:** For maintaining humidity, especially if you're not using a sealed dome. A simple plastic misting bottle costs $5-$10.
Pros and Cons of Soil Propagation
**Pros:**
* **Stronger Roots:** Cuttings develop roots adapted to soil from the start, leading to less transplant shock.
* **Versatility:** Works for a wider range of plants compared to water propagation.
* **Nutrient Availability:** While rooting medium is sterile, it can hold some nutrients if you choose a mix with a small amount of compost or worm castings.
**Cons:**
* **Less Visible Progress:** You can't see the roots forming, so it requires more patience and trust.
* **Risk of Rot/Fungus:** If the medium is too wet or not sterile, cuttings can be susceptible to fungal diseases.
* **Messier:** Involves soil, which can be a bit messy.
Method 3 Air Layering An Advanced Technique for Woody Flowers
Air layering is a fascinating and highly effective method, particularly for woody plants or those that are difficult to root from conventional stem cuttings. It involves encouraging roots to form on a stem while it's still attached to the parent plant. This provides the cutting with continuous nourishment and hydration, significantly increasing the success rate. It's commonly used for plants like Rhododendrons, Azaleas, Magnolias, and even some fruit trees, but can also be applied to woody flowering shrubs like Camellias or certain types of Roses.
Step-by-Step Air Layering Guide
1. **Select Your Branch:** Choose a healthy, pencil-thick branch that is about 1-2 years old. It should be free of diseases and pests. Select a section of the branch that is straight and has no side shoots for about 6-12 inches.
2. **Prepare the Branch:** About 6-12 inches from the tip of the branch, make two parallel cuts around the circumference of the branch, about 1 inch apart. Use a sharp, clean knife or scalpel. Ensure the cuts go through the bark and cambium layer (the green layer just under the bark).
3. **Remove the Bark:** Carefully peel off the ring of bark between the two cuts. Scrape away any remaining green cambium layer to expose the inner woody tissue. This prevents the bark from healing back together and encourages root formation.
4. **Apply Rooting Hormone (Crucial):** Apply a generous amount of rooting hormone (gel or powder) to the exposed woody ring. This is a critical step for air layering success.
5. **Wrap with Moist Sphagnum Moss:** Take a handful of moist (not dripping wet) sphagnum moss and wrap it completely around the exposed ring. Form a ball of moss about the size of a tennis ball or larger, ensuring it's firmly packed around the cut area.
6. **Cover with Plastic:** Wrap the moss ball tightly with clear plastic sheeting (like cling film or a plastic bag). Secure both ends of the plastic with electrical tape, twist ties, or zip ties to create a sealed packet. This keeps the moss moist and provides a humid environment for rooting.
7. **Provide Support (Optional):** For heavier branches, you might want to provide some support to prevent the branch from breaking, especially as the moss ball adds weight.
8. **Wait for Roots:** Place the plant in a location with bright, indirect light. Over several weeks to months (depending on the plant), you should see roots forming inside the moss ball through the clear plastic. This is the most exciting part!
9. **Sever and Plant:** Once a good network of roots has formed (they should be visible and fill a good portion of the moss ball), carefully cut the branch just below the rooted section. Remove the plastic wrap and gently plant the new rooted plant into a pot filled with a well-draining potting mix. Keep it well-watered and in a sheltered location for a few weeks to allow it to acclimate before moving it to its final spot.
Recommended Products for Air Layering
Air layering requires a few specific items to create the ideal rooting environment on the parent plant.
* **Sharp Knife or Scalpel:** For making precise cuts on the branch.
* **X-Acto Knife Set:** A set of craft knives with various blades can be very useful for precise cuts, costing around $10-$20.
* **Grafting Knife:** Specialized grafting knives are extremely sharp and designed for clean cuts on woody stems. A good quality one might be $20-$50.
* **Rooting Hormone (Gel or Powder):** Absolutely essential for stimulating root growth in air layering.
* **Clonex Rooting Gel:** Its gel consistency makes it easy to apply and adhere to the exposed woody tissue. $15-$25 for 100ml.
* **Hormex Rooting Powder #8 (for woody cuttings):** Hormex offers different strengths; #8 is suitable for difficult-to-root woody plants. A small container is typically $10-$20.
* **Long-Fiber Sphagnum Moss:** This is the preferred medium for air layering due to its excellent water retention and aeration properties.
* **Besgrow Spagmoss (New Zealand Sphagnum Moss):** Considered premium quality, often used by orchid growers, it's excellent for air layering. A 100g bag can be $15-$25.
* **Mosser Lee Sphagnum Moss:** A more widely available and affordable option, usually $8-$15 for a large bag.
* **Clear Plastic Sheeting/Cling Film:** To wrap the moss and create a humid environment. Standard kitchen cling film works, or you can buy thicker plastic sheeting from a hardware store.
* **Electrical Tape/Zip Ties/Twist Ties:** For securely sealing the plastic wrap around the moss ball.
* **Air Layering Pods (Optional but Convenient):** These are reusable plastic spheres that snap around the branch, holding the moss in place and providing a ready-made mini-greenhouse. They come in various sizes.
* **Plant Rooting Grow Boxes (various brands on Amazon):** A pack of 5-10 pods can range from $15-$30, depending on size. They simplify the wrapping process and are reusable.
Pros and Cons of Air Layering
**Pros:**
* **High Success Rate:** Because the cutting remains attached to the parent plant, it receives continuous water and nutrients, leading to a very high success rate.
* **Larger Plants:** You can start with a larger section of the plant, resulting in a more substantial new plant faster.
* **Good for Difficult Plants:** Ideal for woody plants that are challenging to root from conventional cuttings.
**Cons:**
* **More Involved:** Requires a bit more technique and specific steps compared to water or soil propagation.
* **Time-Consuming:** Can take several weeks to months for roots to form.
* **Limited Number of Cuttings:** You can only do a few air layers on a single plant at a time without stressing it.
Troubleshooting Common Propagation Problems and Solutions
Even with the best intentions, propagation can sometimes throw a curveball. Here are some common issues you might encounter and how to tackle them:
Cuttings Rotting Before Rooting
* **Cause:** Too much moisture, poor air circulation, or non-sterile medium/water.
* **Solution:** Ensure your rooting medium is well-draining and not soggy. If using water, change it frequently. If using soil, ensure good air circulation by opening humidity domes daily. Use sterile tools and fresh rooting medium. Consider adding a fungicide to your water or soil if rot is a persistent problem.
Leaves Turning Yellow or Dropping
* **Cause:** Lack of humidity, too much direct sunlight, or the cutting is putting all its energy into root production (which is normal to some extent).
* **Solution:** Increase humidity by misting or ensuring your humidity dome is sealed. Move the cutting to a spot with bright, indirect light. If only a few lower leaves yellow and drop, it's often normal as the plant redirects energy.
No Roots Forming
* **Cause:** Not enough time, incorrect temperature, lack of rooting hormone, or the wrong type of cutting.
* **Solution:** Be patient! Some plants take longer. Ensure the temperature is consistently warm (70-75°F or 21-24°C is often ideal). Always use rooting hormone for soil and air layering, and consider it for water propagation. Make sure you're taking cuttings from the right part of the plant (e.g., semi-hardwood for woody plants, not too soft or too old).
Pests on Cuttings
* **Cause:** Pests were present on the parent plant, or they found their way to your cuttings.
* **Solution:** Always inspect parent plants for pests before taking cuttings. If you find pests, isolate the affected cutting immediately. For small infestations, a gentle wipe with a damp cloth or a spray of insecticidal soap can help. Ensure good air circulation to deter pests like fungus gnats.
Transplant Shock After Potting
* **Cause:** Sudden change in environment (humidity, light, medium) when moving from water/propagation medium to soil.
* **Solution:** Acclimate your rooted cuttings gradually. If rooted in water, introduce them to a very light, well-draining potting mix first. If rooted under a humidity dome, gradually remove the dome over several days to a week, allowing the plant to adjust to lower humidity. Keep the soil consistently moist during this transition period.
Beyond the Basics Expanding Your Propagation Skills
Once you've mastered these three methods, you'll find a whole new world of gardening possibilities opening up. You can experiment with different types of plants, try propagating from leaf cuttings (like for African Violets or Begonias), or even delve into more advanced techniques like grafting. The joy of propagation lies in its endless learning curve and the satisfaction of creating new life from a small piece of an existing plant.
Remember, gardening is all about experimentation and learning from your successes and failures. Don't be afraid to try different methods or different plants. Each plant is unique, and what works for one might not work for another. Keep a simple garden journal to note down what you propagated, when, using which method, and the results. This will be an invaluable resource for your future propagation endeavors.
Happy propagating, and enjoy your ever-expanding garden!
:max_bytes(150000):strip_icc()/277019-baked-pork-chops-with-cream-of-mushroom-soup-DDMFS-beauty-4x3-BG-7505-5762b731cf30447d9cbbbbbf387beafa.jpg)